Build a Dynamic E-Commerce Store UI with Astro, Neon Postgres, and AWS Amplify
A step-by-step guide to building an e-commerce store UI in Astro and Postgres

This guide covers the step-by-step process of building an e-commerce store UI powered by Neon in Astro and Postgres. Upon completing the guide, you will understand how to build dynamic pages in Astro by querying your Postgres database over HTTP requests and automating deployments on Git commits using AWS Amplify.
Prerequisites
To follow along this guide, you will need the following:
- Node.js 18 or later
- A Neon account
- An AWS account
Steps
- Provisioning a Serverless Postgres powered by Neon
- Create a new Astro application
- Setting up a Postgres Database Connection and Schema
- Define the Astro application routes
- Deploy to AWS Amplify
Provisioning a Serverless Postgres powered by Neon
Using Serverless Postgres database powered by Neon helps you scale down to zero. With Neon, you only have to pay for what you use.
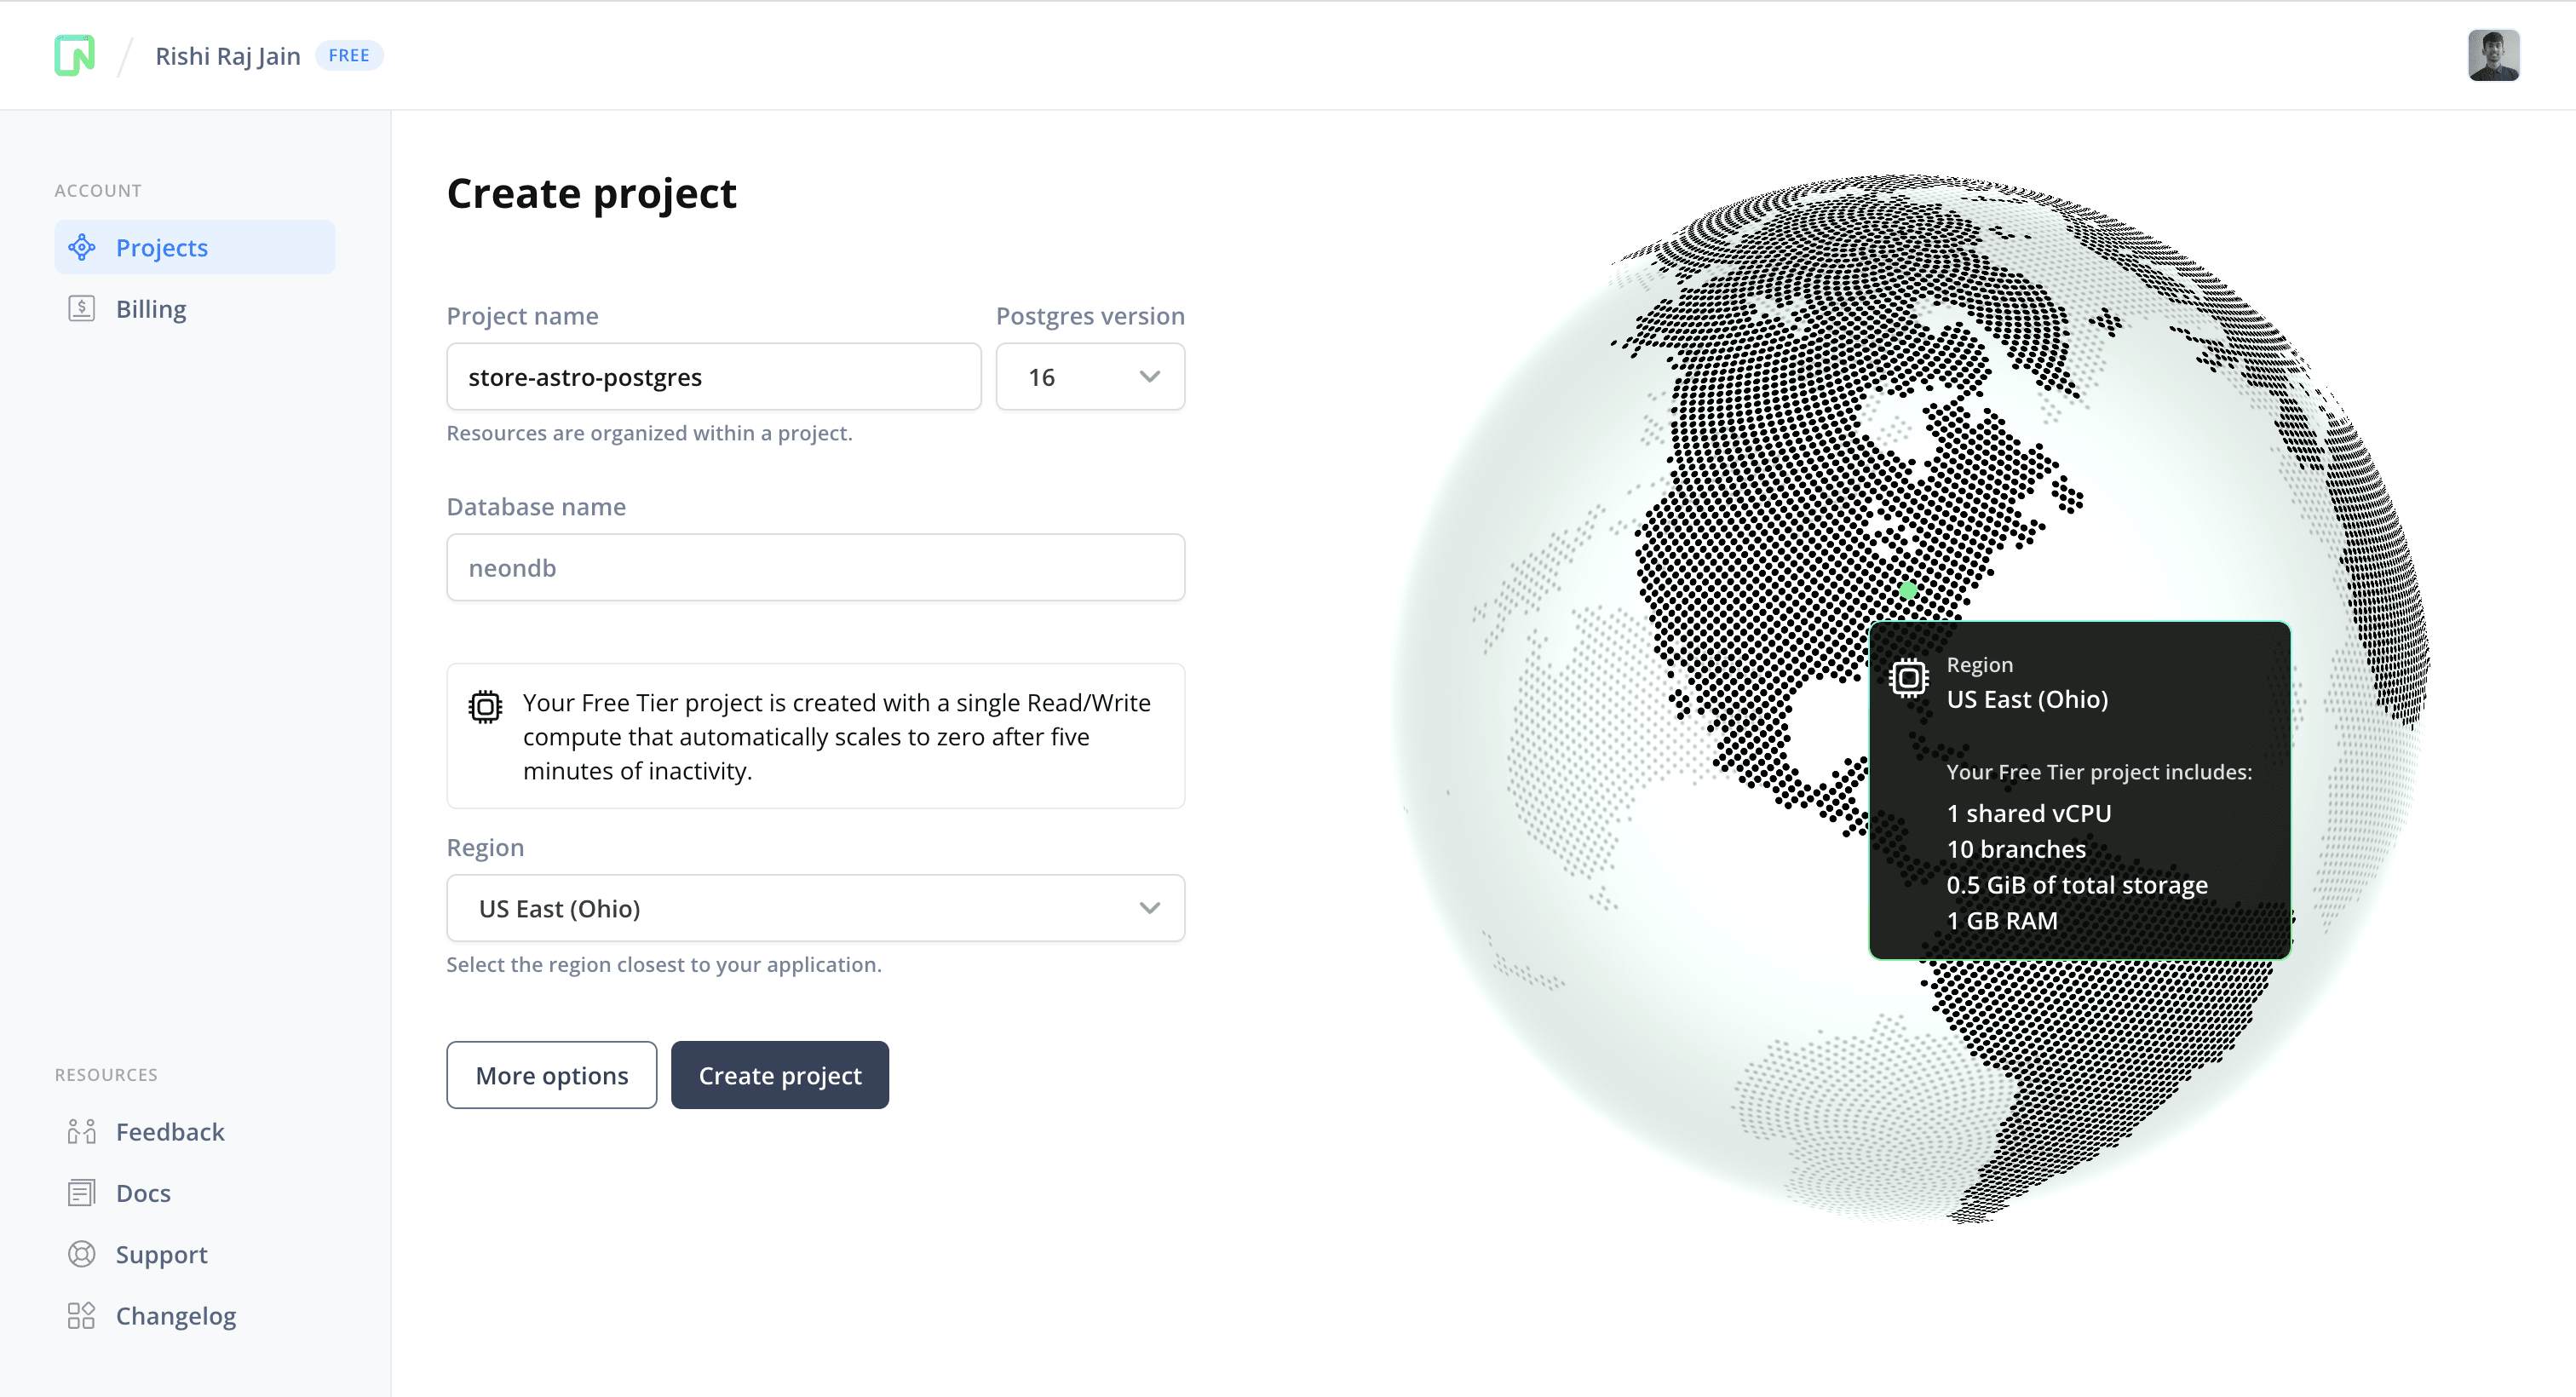
To get started, go to the Neon console and enter the name of your choice as the project name. You can pick a region near where you will deploy your Astro application. By default, version 16 of Postgres is used. Finally, click on Create Project to create the Postgres database named neondb (by default).
You will then be presented with a dialog that provides a connecting string of your database. Click on Pooled connection on the top right of the dialog and the connecting string automatically updates in the box below it.
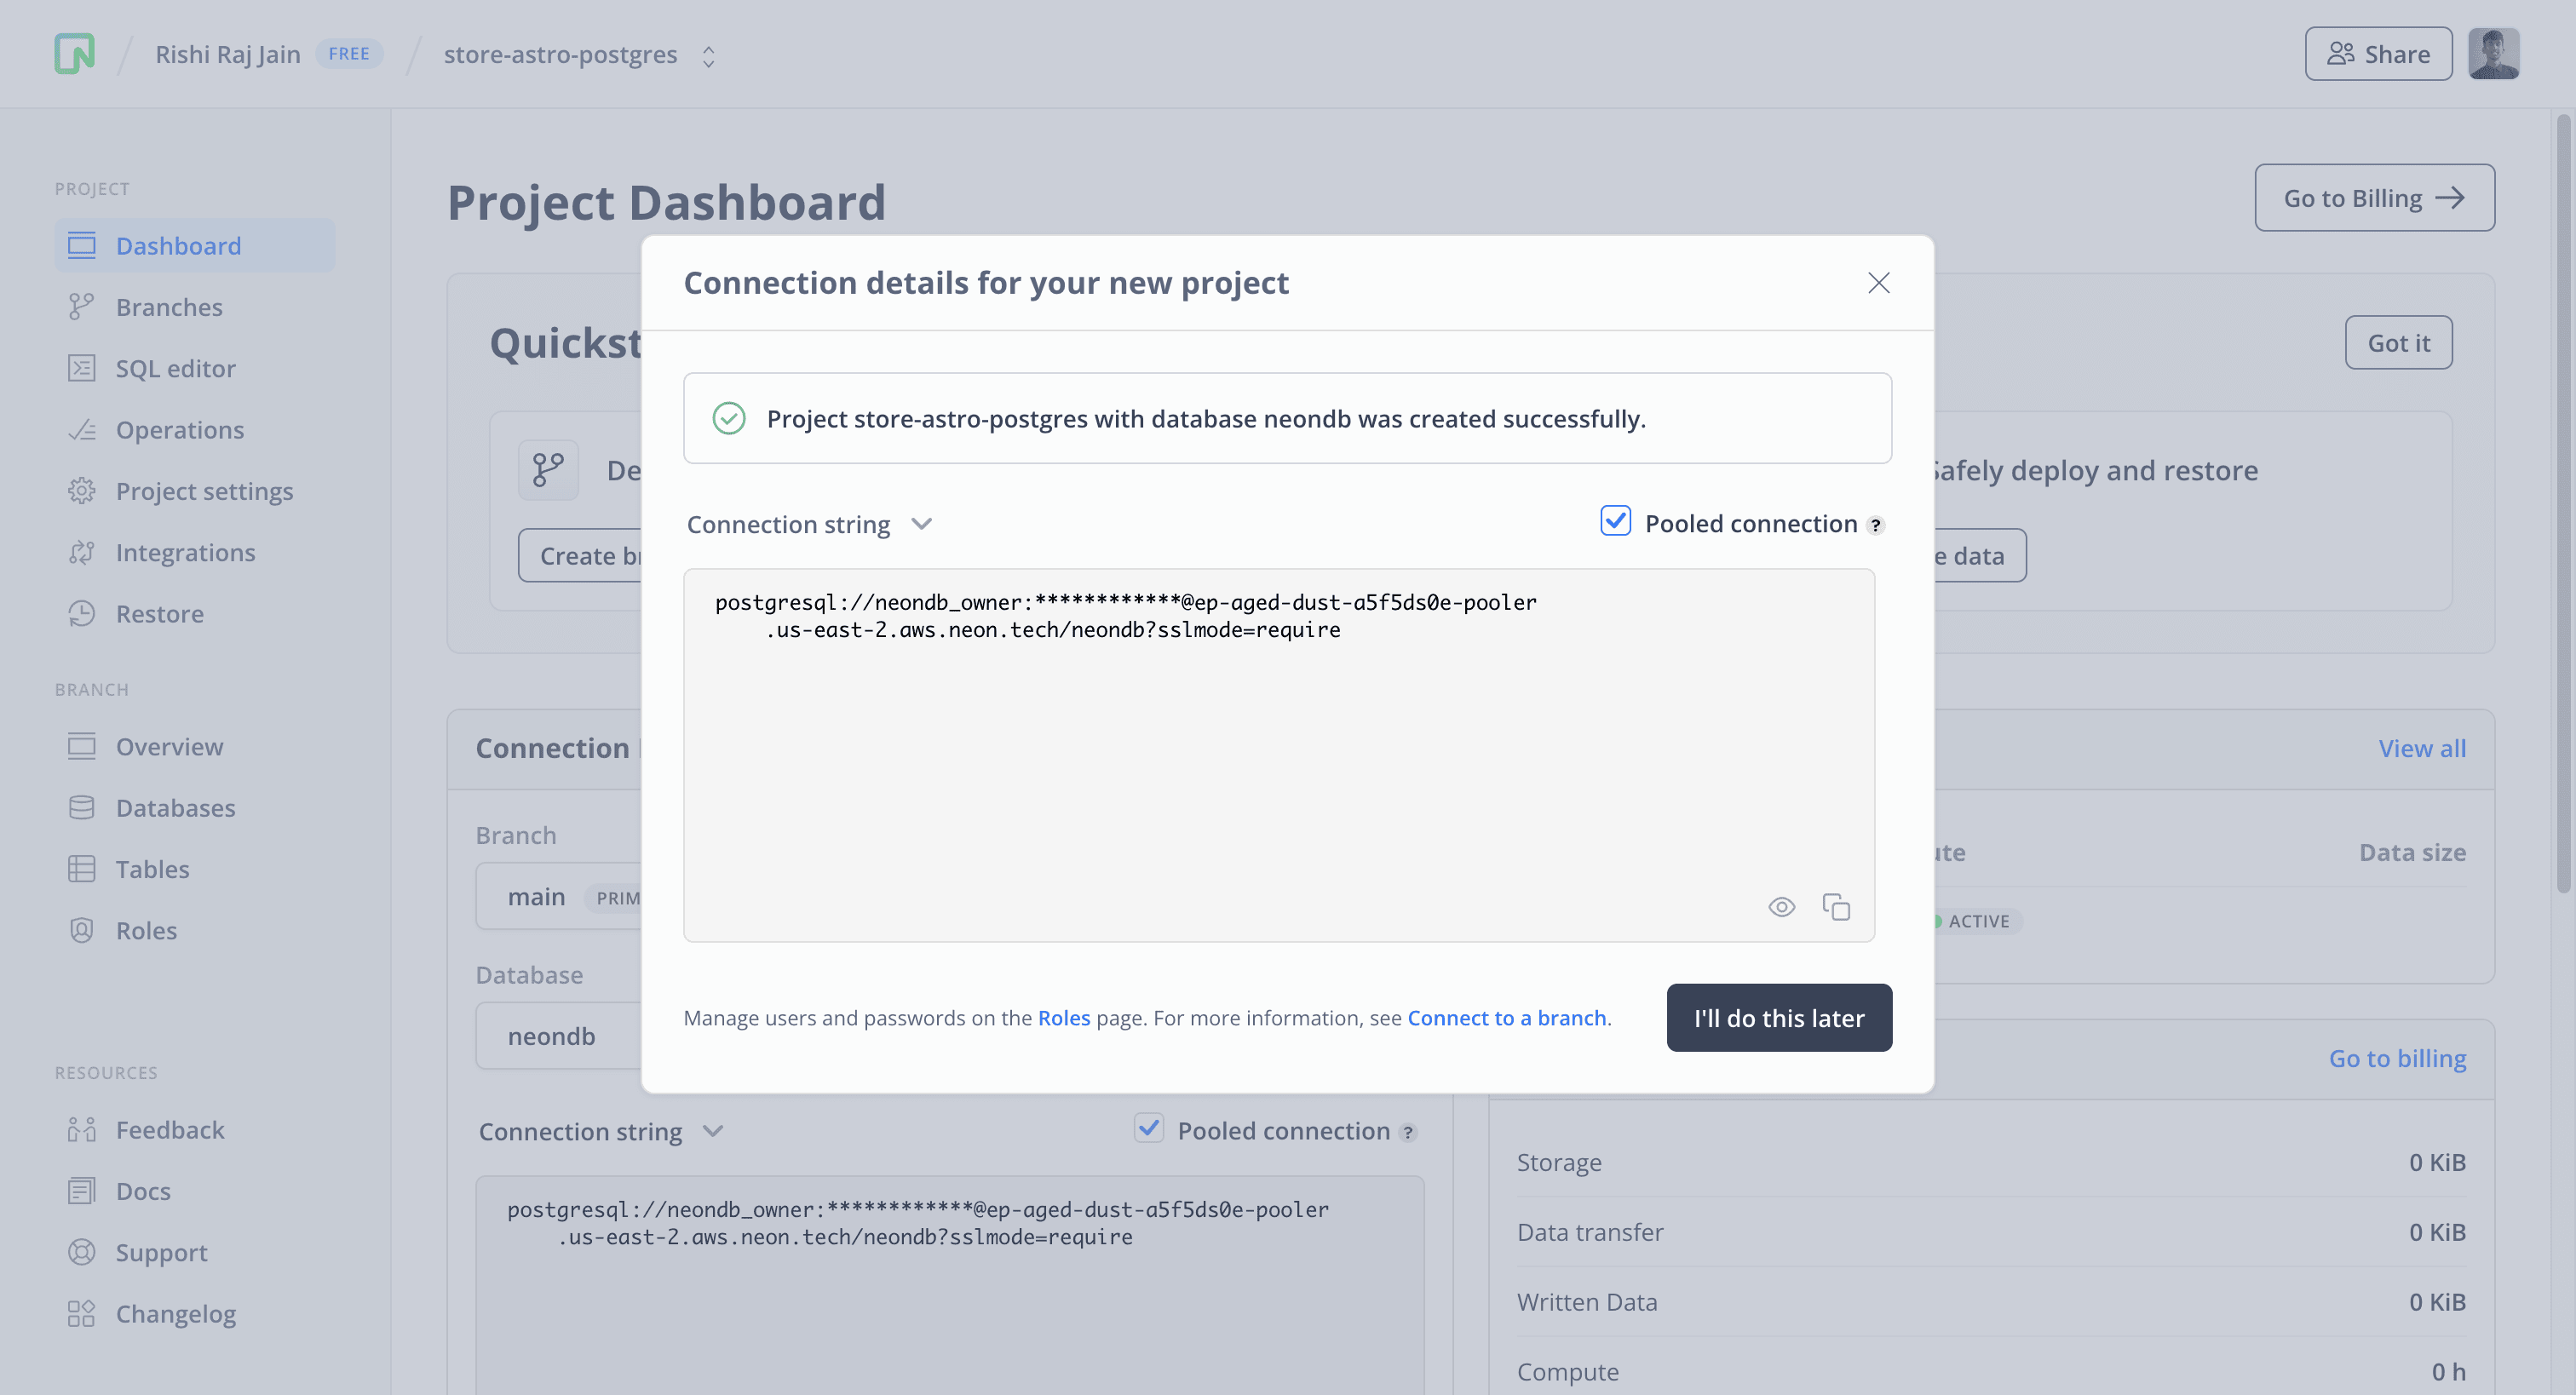
All Neon connection strings have the following format:
postgres://<user>:<password>@<endpoint_hostname>.neon.tech:<port>/<dbname>?sslmode=requireuseris the database user.passwordis the database user’s password.endpoint_hostnameis the host with neon.tech as the TLD.portis the Neon port number. The default port number is 5432.dbnameis the name of the database. “neondb” is the default database created with each Neon project.?sslmode=requirean optional query parameter that enforces the SSL mode while connecting to the Postgres instance for better security.
Save this connecting string somewhere safe to be used as the POSTGRES_URL further in the guide. Proceed further in this guide to create a Astro application.
Create a new Astro application
Let’s get started by creating a new Astro project. Open your terminal and run the following command:
npm create astro@latest store-astro-postgresnpm create astro is the recommended way to scaffold an Astro project quickly.
When prompted, choose:
Emptywhen prompted on how to start the new project.Yeswhen prompted if plan to write Typescript.Strictwhen prompted how strict Typescript should be.Yeswhen prompted to install dependencies.Yeswhen prompted to initialize a git repository.
Once that’s done, you can move into the project directory and start the app:
cd store-astro-postgres
npm run dev
The app should be running on localhost:4321.
Next, in your first terminal window, run the command below to install the necessary libraries and packages for building the application:
npm install @neondatabase/serverless dotenv
npm install -D tsx
The above command installs the packages passed to the install command, with the -D flag specifying the libraries intended for development purposes only.
The libraries installed include:
@neondatabase/serverless: Neon’s PostgreSQL driver for JavaScript and TypeScript.dotenv: A library for handling environment variables.
The development-specific libraries include:
tsx: To execute and rebuild TypeScript efficiently.
Further, make the following additions in your tsconfig.json file to make relative imports within the project easier:
{
  "extends": "astro/tsconfigs/strict",
+  "compilerOptions": {
+    "baseUrl": ".",
+    "paths": {
+      "@/*": ["src/*"]
+    }
+  }
}
Let’s move on to integrating Tailwind CSS in the Astro application.
Add Tailwind CSS to the application
For styling the app, you will be using Tailwind CSS. Install and set up Tailwind at the root of our project’s directory by running:
npx astro add tailwindWhen prompted, choose:
Yeswhen prompted to install the Tailwind dependencies.Yeswhen prompted to generate a minimaltailwind.config.mjsfile.Yeswhen prompted to make changes to Astro configuration file.
With choices as above, the command finishes integrating TailwindCSS into your Astro project. It installed the following dependency:
tailwindcss: TailwindCSS as a package to scan your project files to generate corresponding styles.@astrojs/tailwind: The adapter that brings Tailwind’s utility CSS classes to every.astrofile and framework component in your project.
Let’s move on to enabling server side rendering in the Astro application.
Enabling Server Side Rendering in Astro with AWS Amplify
To fetch and render products dynamically, you’re going to enable server-side rendering in your Astro application. Execute the following command in your terminal:
npm install astro-aws-amplifyThe libraries installed include:
astro-aws-amplify: An adapter that prepares Astro websites to be deployed on AWS Amplify.
Then, make the following additions in the astro.config.mjs file:
import tailwind from "@astrojs/tailwind";
import { defineConfig } from 'astro/config';
+ import awsAmplify from 'astro-aws-amplify';

// https://astro.build/config
export default defineConfig({
+  output: "server",
+  adapter: awsAmplify(),
  integrations: [tailwind()]
});
The additions above begin with importing the default module of astro-aws-amplify and use it as the adapter with the Astro application. Also, it sets output configuration key as server so that the pages are generated dynamically, per request.
Then, create a amplify.yml at the root of repository with the following code:
version: 1
frontend:
  phases:
    preBuild:
      commands:
        - npm ci
    build:
      commands:
        - env >> .env
        - npm run build
        - mv node_modules ./.amplify-hosting/compute/default
        - mv .env ./.amplify-hosting/compute/default/.env
  artifacts:
    baseDirectory: .amplify-hosting
    files:
      - '**/*'
  cache:
    paths:
      - node_modules/**/*
The code above represents a flow of commands that AWS Amplify would execute during the build phase. The commands in preBuild are ran before AWS Amplify reaches the build step. On reaching the build step, it executes the commands specified under the build section. The build commands are as follows:
env >> .env: Outputs all the environment variables into a file.envat the root of the project.npm run build: Invokesastro buildto build the Astro project.mv node_modules ./.amplify-hosting/compute/default: Moves thenode_modulesdirectory from the root of the project to the.amplify-hosting/compute/defaultdirectory.mv .env ./.amplify-hosting/compute/default/.env: Moves the.envfrom the root of the project to the.amplify-hosting/compute/defaultdirectory.
Let’s move on to setting up Postgres instance to insert and retrieve product(s).
Setting up a Postgres Database Connection and Schema
In this section, you’ll learn how to configure a secure connection to the Postgres database, create a client to interact with it, and populate the tables in the database.
Set up the database connection
Create an .env file in the root directory of your project with the following enviroment variable to initiate the setup of a database connection:
# Neon Postgres Pooled Connection URL
POSTGRES_URL="postgres://<user>:<password>@<endpoint_hostname>.neon.tech:<port>/<dbname>?sslmode=require"
The file, .env should be kept secret and not included in Git history. Ensure that .env is added to the .gitignore file in your project.
Create the database client
First, create a postgres directory in the src directory by running the following command:
mkdir src/postgresThen, to create a client that interacts with your serverless postgres, create a setup.ts file inside the src/postgres directory with the following code:
// File: src/postgres/setup.ts

// Load the environment variables
import 'dotenv/config'

// Load the postgres module
import { neon } from "@neondatabase/serverless";

// Create a in-memory SQL query function so that it's cached for multiple calls
export default neon(`${process.env.POSTGRES_URL}`);
The code imports the dotenv configuration, making sure that all the environment variables in the .env file are present in the runtime. Then, the code imports the @neondatabase/serverless library, retrieves the database URL from the environment variables, and uses it to create a new SQL query function, which is subsequently exported.
Create mock data
In the postgres directory, create a file named data.ts with the following code:
// File: src/postgres/data.ts

export interface ProductProps {
  name: string;
  slug: string;
  price: string;
  image: string;
  currency: string;
  description?: string;
}

export const products: ProductProps[] = [
  {
    name: "iPhone 9",
    slug: "iphone-9",
    price: "993",
    image: "https://source.unsplash.com/random/300×300?a=1",
    currency: "USD",
    description: "An apple mobile which is nothing like apple",
  },
  {
    name: "MacBook Pro",
    slug: "macbook-pro",
    price: "1999",
    image: "https://source.unsplash.com/random/300×300?a=6",
    currency: "USD",
    description:
      "MacBook Pro 2021 with mini-LED display may launch between September, November",
  },
]
The code begins with exporting an interface that represents the fields associated with each product stored in the database. Further, it exports a products array that contains two sample products. Let’s use postgres instance to populate these products in the database.
Create the database schema
In the postgres directory, create a file named schema.ts with the following code which will allow you to create and populate the products in a database table.
// File: src/postgres/schema.ts

import { products } from "./data";
import postgres from "@/postgres/setup";

async function createSchema() {
  // Create the producs table if it does not exists
  await postgres`
    CREATE TABLE IF NOT EXISTS products (
      id SERIAL PRIMARY KEY,
      image TEXT,
      name VARCHAR(255),
      price DECIMAL(10, 2),
      currency VARCHAR(10),
      slug VARCHAR(255),
      description TEXT
    );
  `;
  await Promise.all(
    products.map(
      ({ image, name, price, currency, slug, description }) =>
        postgres`INSERT INTO products (
        image, name, price, currency, slug, description
      ) VALUES (
        ${image}, ${name}, ${price}, ${currency}, ${slug}, ${description}
      )`
    )
  );
  console.log("Finished setting up the database.");
}

createSchema();
The code above defines how data will be stored, organized and managed in the database. Using the postgres database instance, it executes an SQL query to create a products table within the database if it does not already exist. This table comprises of seven columns:
- An
idcolumn for storing random identifiers for each product in the table, generated automatically. - An
imagecolumn for storing absolute URLs of each product in the table. - A
namecolumn for storing name of each product in the table. - A
pricecolumn for storing the cost of each product in the table, expected string to be without currency symbol. - A
currencycolumn for storing the currency symbol of each product in the table. - A
slugcolumn for storing a identifier of each product in the table, expected string to be in lowercase and contain no special characters. - A
descriptioncolumn for storing all the details of each product in the table.
Further, the code loops over the existing products array and creates a SQL query for each to be inserted into the products table in your Postgres database.
After executing the two SQL queries, a message is printed to the console if there’s an error during the execution.
Finally, to execute the code in the schema file, make the following addition in the scripts of your package.json file:
{
  // ...
  "scripts": {
    // ...
+    "db:setup": "tsx src/postgres/schema.ts"
    // ...
  }
  // ...
}
Test the database setup locally
To execute the code within schema.ts to set up the database, run the following command in your terminal window:
npm run db:schemaIf the command is executed successfully, you will see no logs in your terminal window except Finished setting up the database., marking the completion of the schema setup in your Postgres Database powered by Neon.
Define the Astro application routes
With Astro, creating a .astro file in the src/pages directory maps it to a route in your application. The name of the file created maps to the route’s URL pathname (with the exception of index.astro, which is the index route).
The structure below is what our src/pages directory will look like at the end of this section:
├── index.astro
├── p/
├──── [slug].astroindex.astrowill serve responses to index route b dynamically fetching products from Neon Postgres.p/[slug].astrowill serve responses to a product route by dynamically fetching product details from Neon Postgres.
| URL | Matched Routes |
|---|---|
/ | src/pages/index.astro |
/p/product-slug | src/pages/p/[slug].astro |
Create a Shared Layout in Astro
Layouts in Astro are built for providing the common HTML elements shared across pages. Each page is bound to have the basic HTML document elements. Further, with <slot /> you’re able to specify where all the children elements (created in individual pages) be rendered.
First, create a layouts directory in the src directory by running the following command:
mkdir src/layoutsThen, create a file named layout.astro with the following code:
---
---

<html lang="en">
  <head>
    <meta charset="utf-8" />
    <link rel="icon" type="image/svg+xml" href="/favicon.svg" />
    <meta name="viewport" content="width=device-width" />
    <meta name="generator" content={Astro.generator} />
    <title>Astro</title>
  </head>
  <body>
    <div class="py-12 w-full flex flex-col items-center">
      <div class="flex flex-col max-w-7xl">
        <div class="flex gap-3 items-end">
          <h1 class="text-4xl font-bold">Shop</h1>
        </div>
        <slot />
      </div>
    </div>
  </body>
</html>
The code above contains the basic HTML document elements and shared styled body elements. Further, it uses <slot /> to render each page unique content below the title Shop.
Let’s move on to creating the index route for listing all the products.
Building Index Route as Product Listing Page
Open the src/pages/index.astro file and replace the existing code with the following:
---
import postgres from "@/postgres/setup";
import Layout from "@/layouts/Layout.astro";
import type { ProductProps } from "@/postgres/data";

const products =
  (await postgres`SELECT image, name, price, currency, slug FROM products;`) as ProductProps[];
---

<Layout>
  <h3 class="mt-4 text-xl text-gray-500">Time to suit up</h3>
  <div class="mt-8 grid gap-4 md:grid-cols-2 md:gap-8 lg:grid-cols-4">
    {
      products.map(({ name, price, currency, image, slug }) => (
        <a href={`/p/${slug}`} class="w-full flex flex-col rounded border">
          <img class="border" src={image} />
          <div class="my-3 flex flex-col px-4">
            <h3 class="text-ellipsis font-sans font-semibold">{name}</h3>
            <span class="mt-3 leading-tight">
              {currency}
              {price}
            </span>
          </div>
        </a>
      ))
    }
  </div>
</Layout>
The code above begins with importing the postgres instance, the shared layout, and the interface representing each product fields. Further, it creates a SQL query using the postgres instance to obtain all the products stored in the database. Upon receiving a succesful response, HTML elements are rendered by looping over the products array. Each product is shown as a hyperlink (to it’s unique page) with it’s name, currency and price.
Let’s move on to creating each product’s page, dynamically.
Building the Product Display Page
Create a file named src/pages/p/[slug].astro file with the following code:
---
import postgres from "@/postgres/setup";
import Layout from "@/layouts/Layout.astro";
import type { ProductProps } from "@/postgres/data";
const { slug } = Astro.params;
const [product] =
(await postgres`SELECT * FROM products WHERE slug = ${slug}`) as ProductProps[];
---
<Layout>
<a class="mt-4 text-md hover:border-b max-w-max text-gray-400" href="/">
← Back To The Shop
</a>
<div class="mt-8 grid gap-4 md:grid-cols-2 md:gap-8">
<img class="w-[90%] border rounded" src={product.image} />
<div class="flex flex-col">
<h3 class="text-5xl">{product.name}</h3>
<span class="mt-3 text-xl">{product.currency}{product.price}</span>
<div class="mt-3">
{product.description}
</div>
</div>
</div>
</Layout>The code above begins with importing the postgres instance, the shared layout, and the interface representing each product fields. Further, it obtains the slug of the page from Astro.params API. slug is just a variable name for the dynamic part of the URLs after /p/. For example, in URLs ending with /p/iphone and /p/samsung, iphone and samsung would be the value of slug, respectively. Further, it creates a SQL query to find only the product whose slug field matches with the slug obtained from the URL. Using product details obtained, the HTML elements pertaining to the product are rendered.
Deploy to AWS Amplify
The code is now ready to deploy to AWS Amplify. Use the following steps to deploy:
- Start by creating a GitHub repository containing your app’s code.
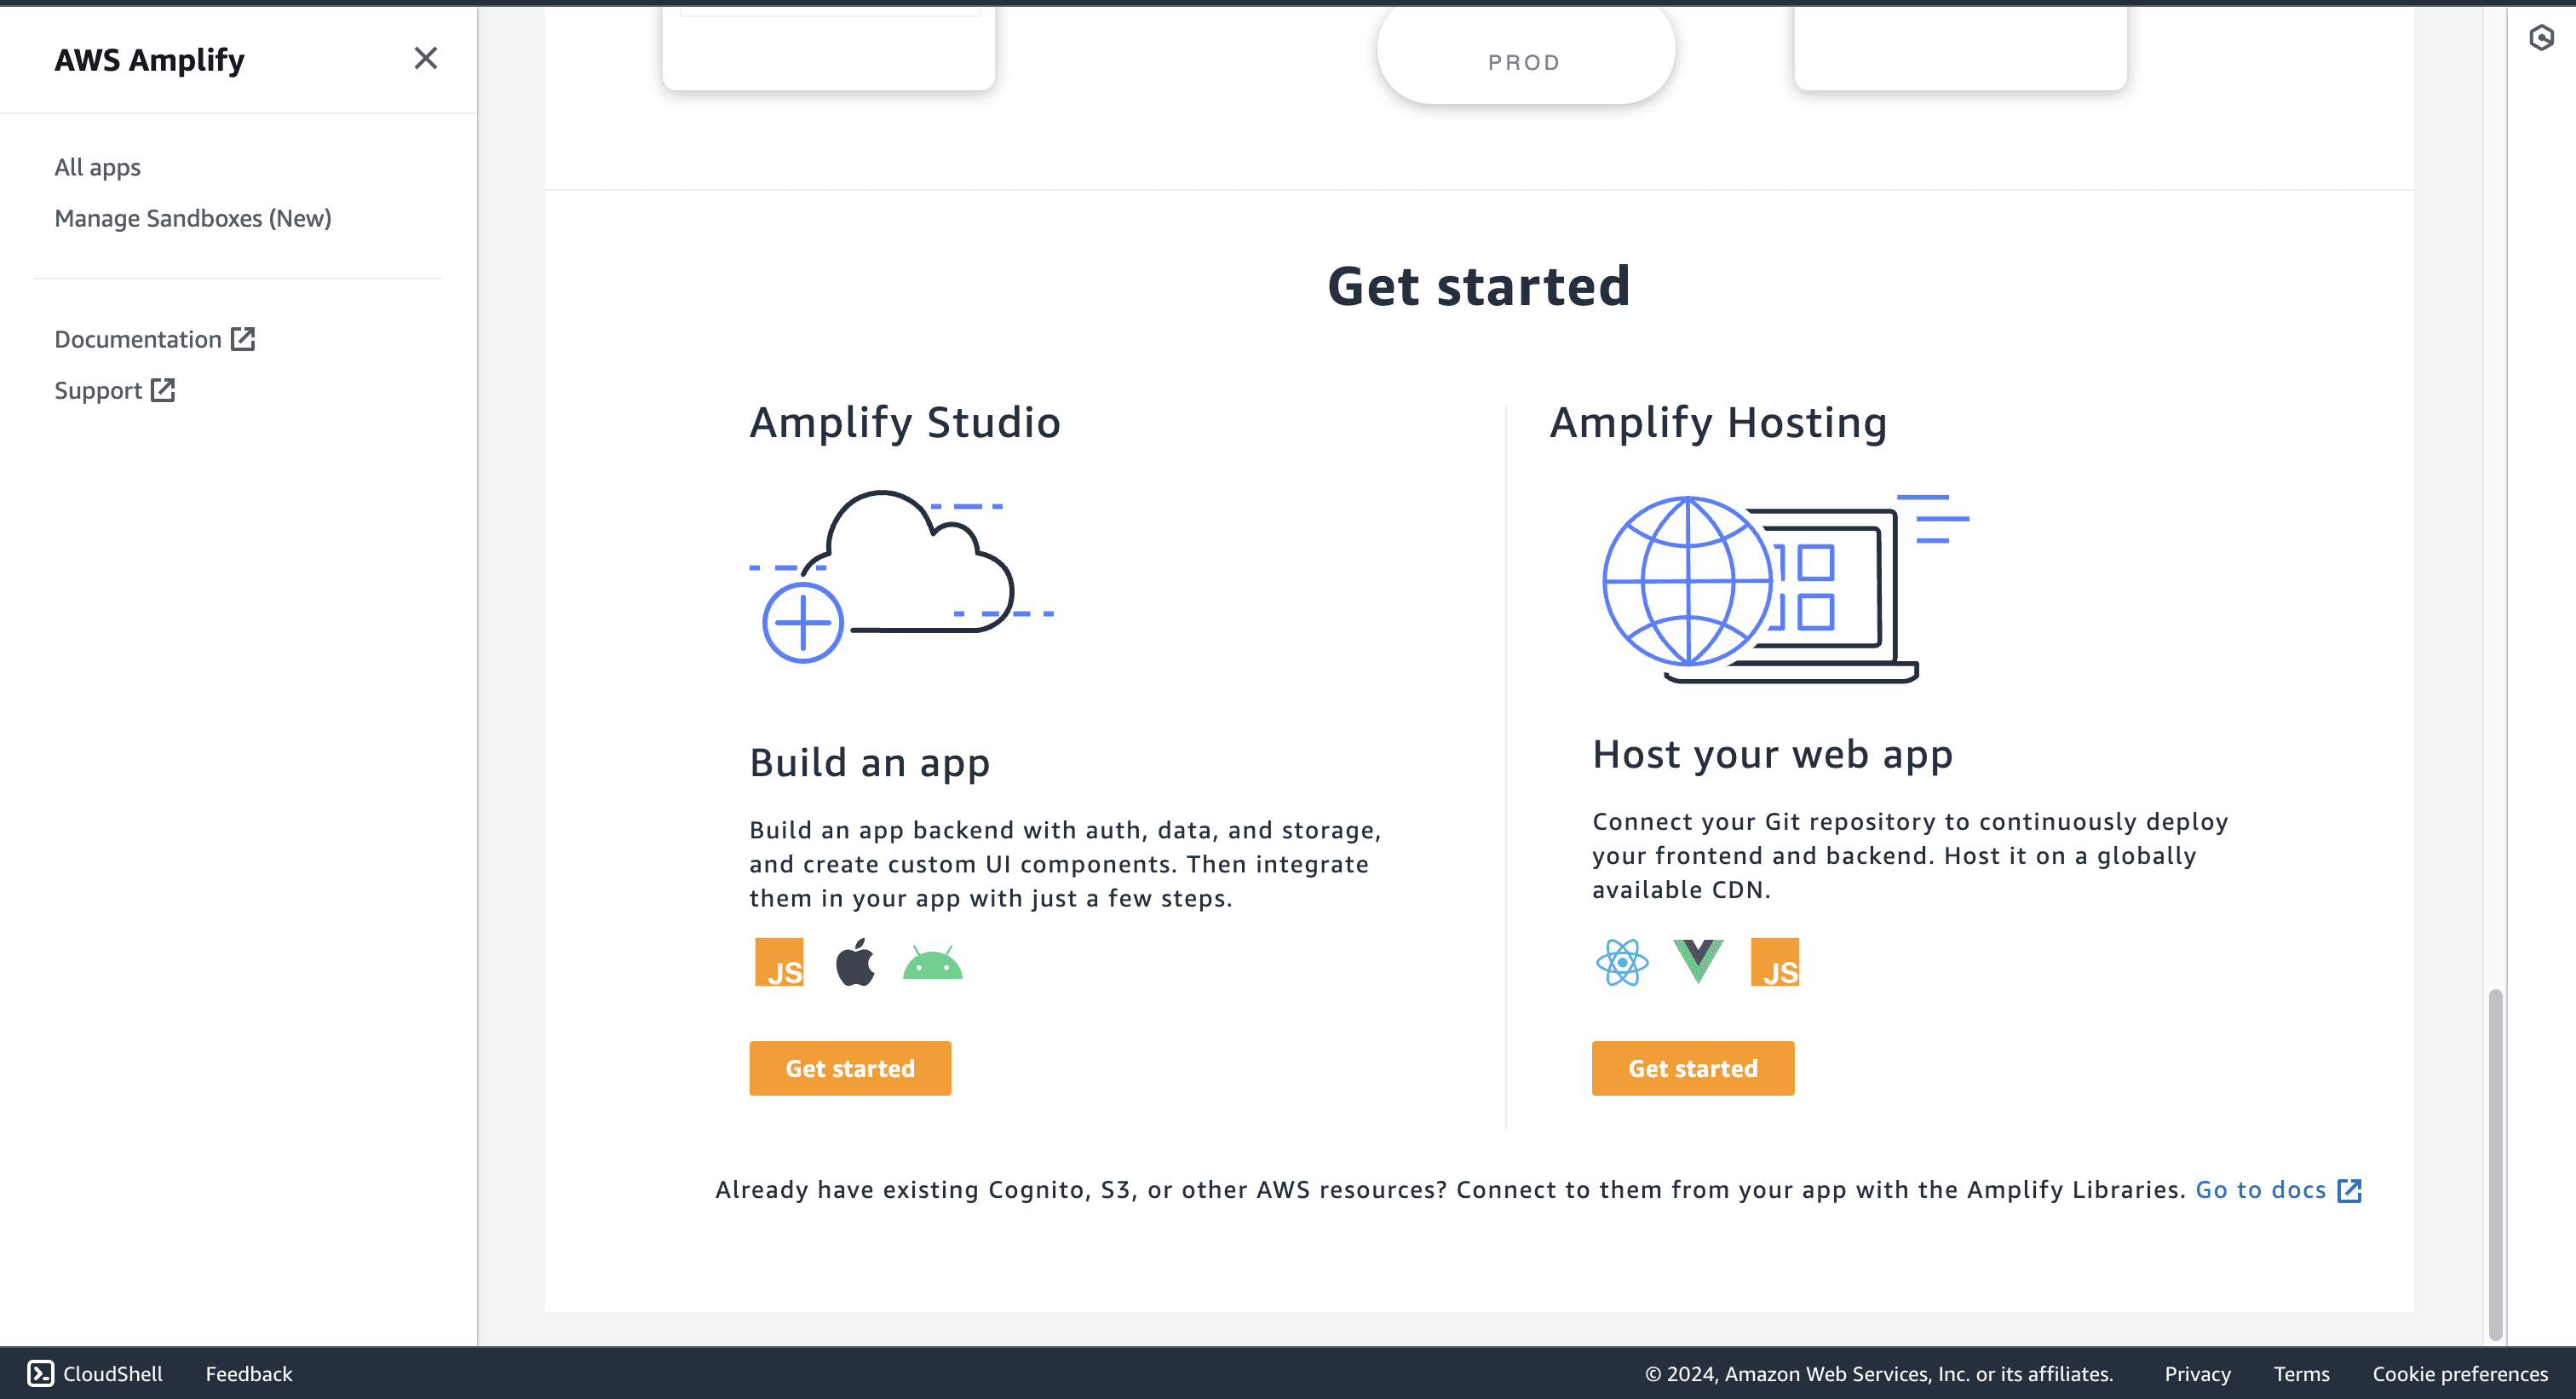
- Then, navigate to the AWS Amplify Dashboard and click on Get Started under Host your web app section.
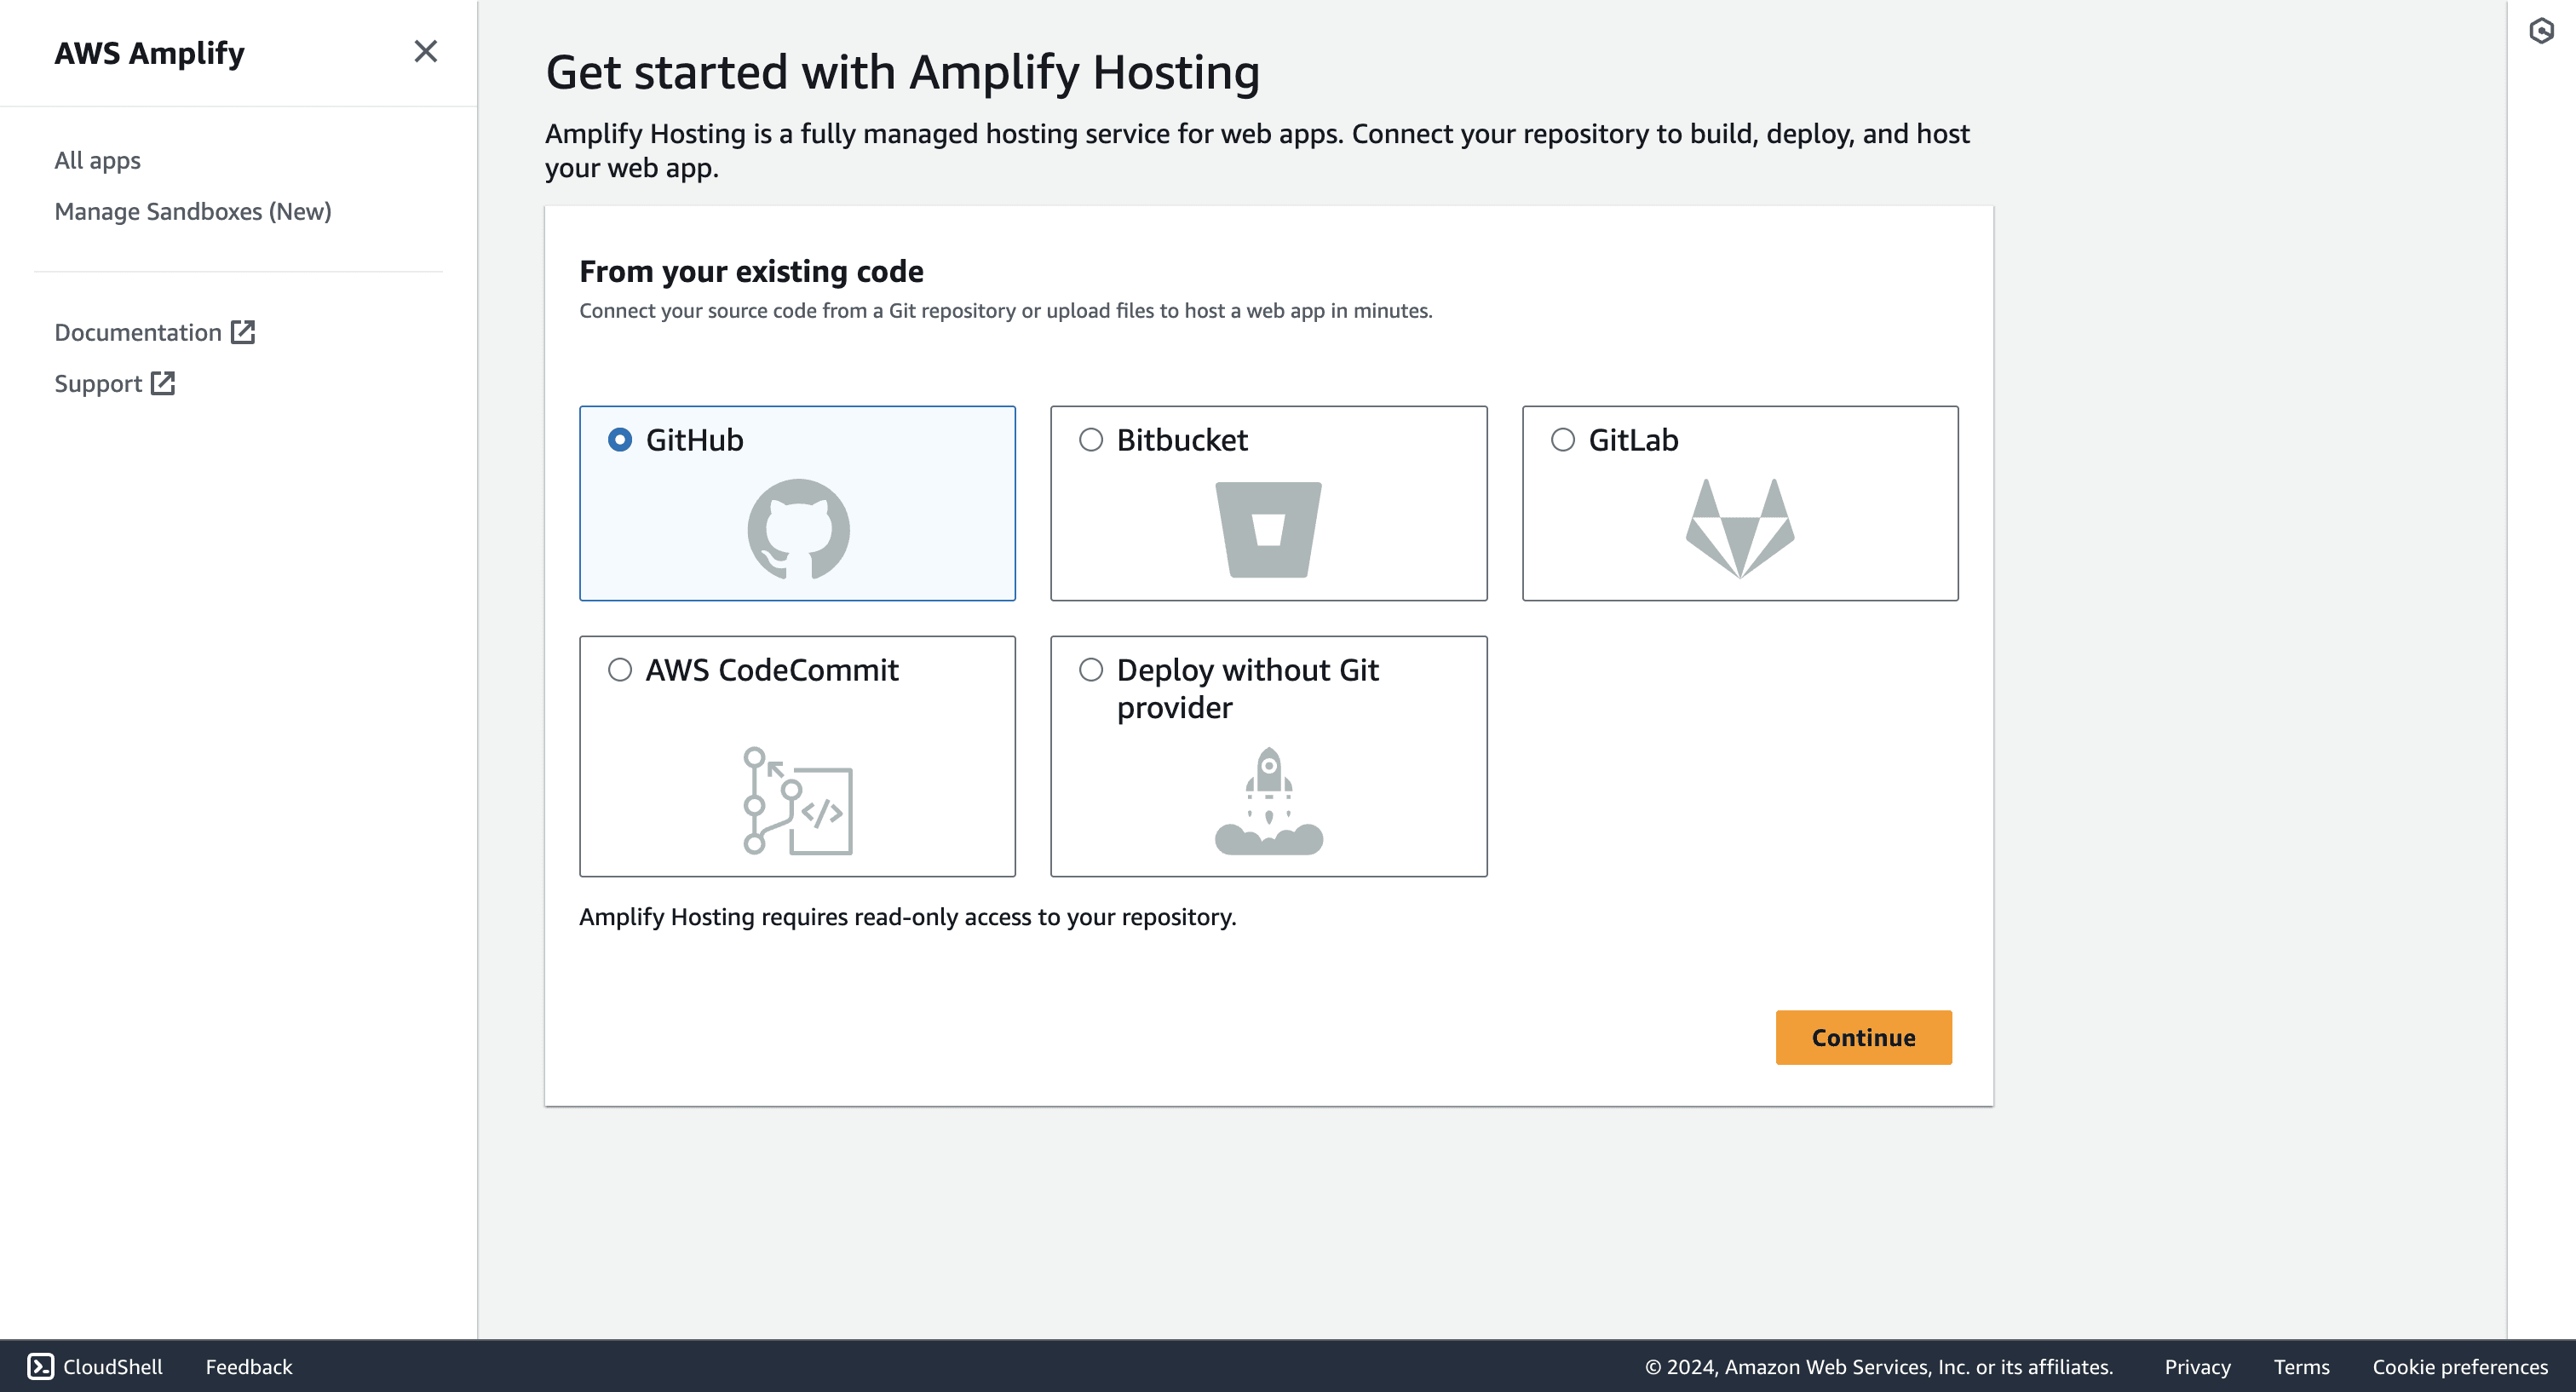
- Select GitHub as the source of your Git repository.
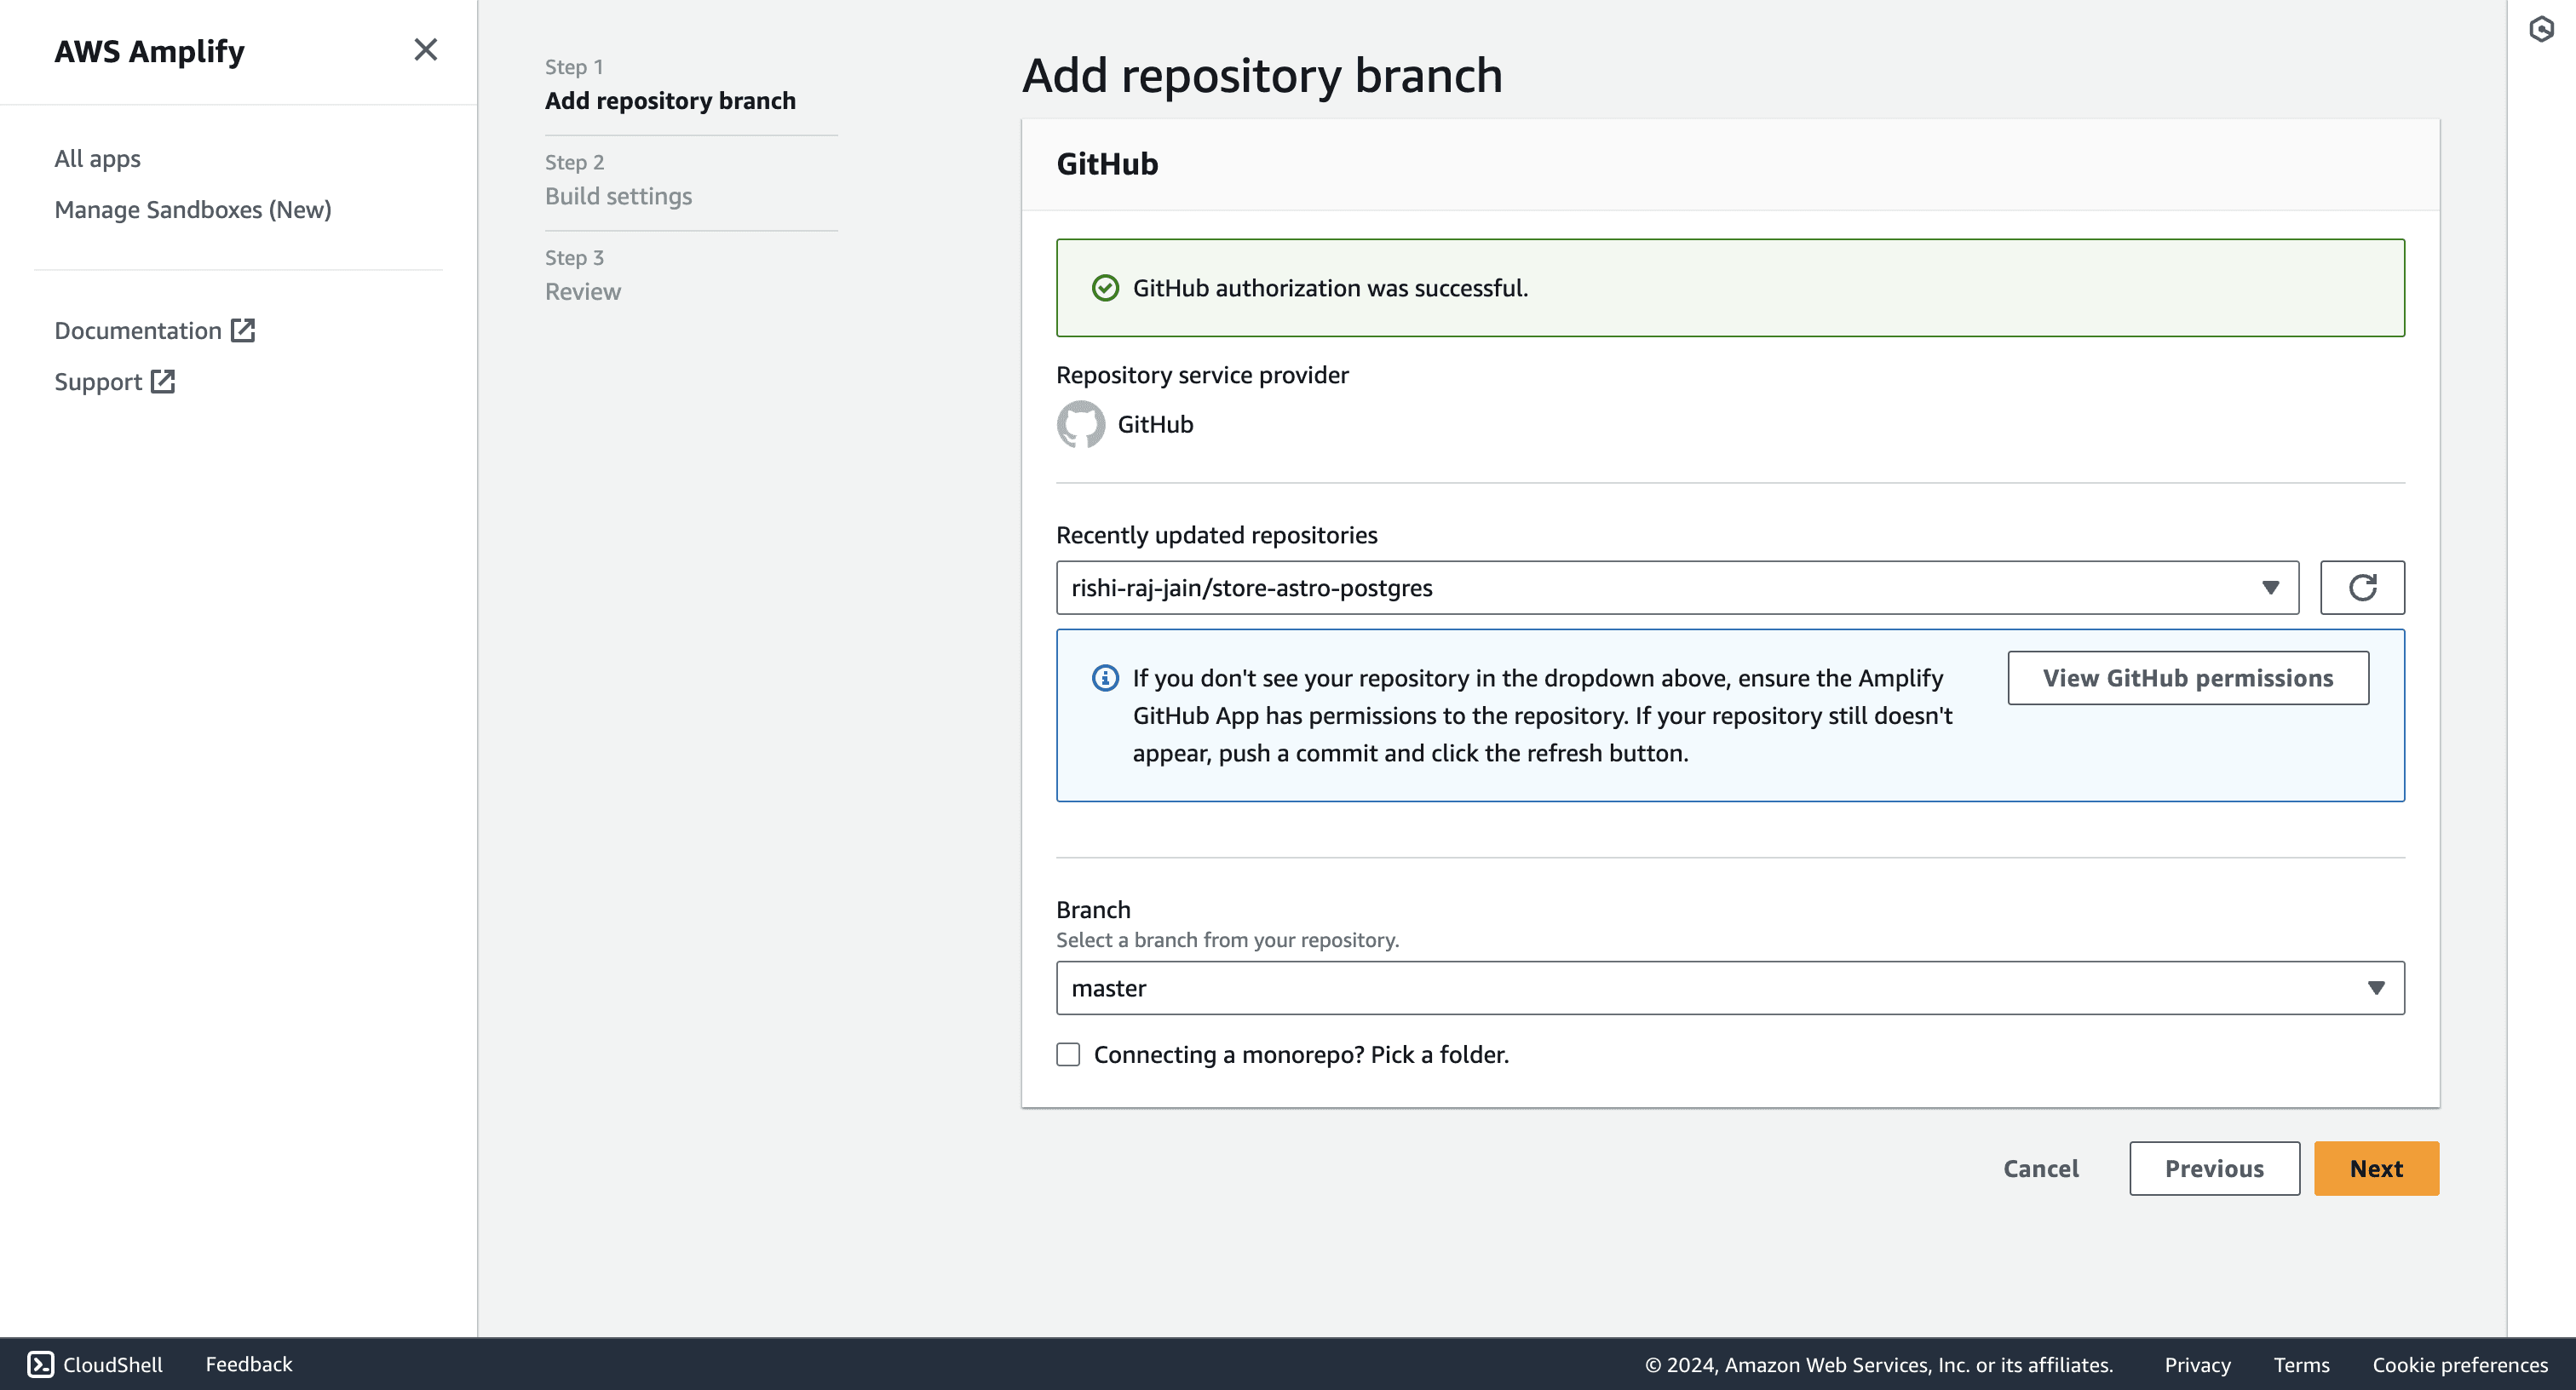
- Link the new project to the GitHub repository you just created.
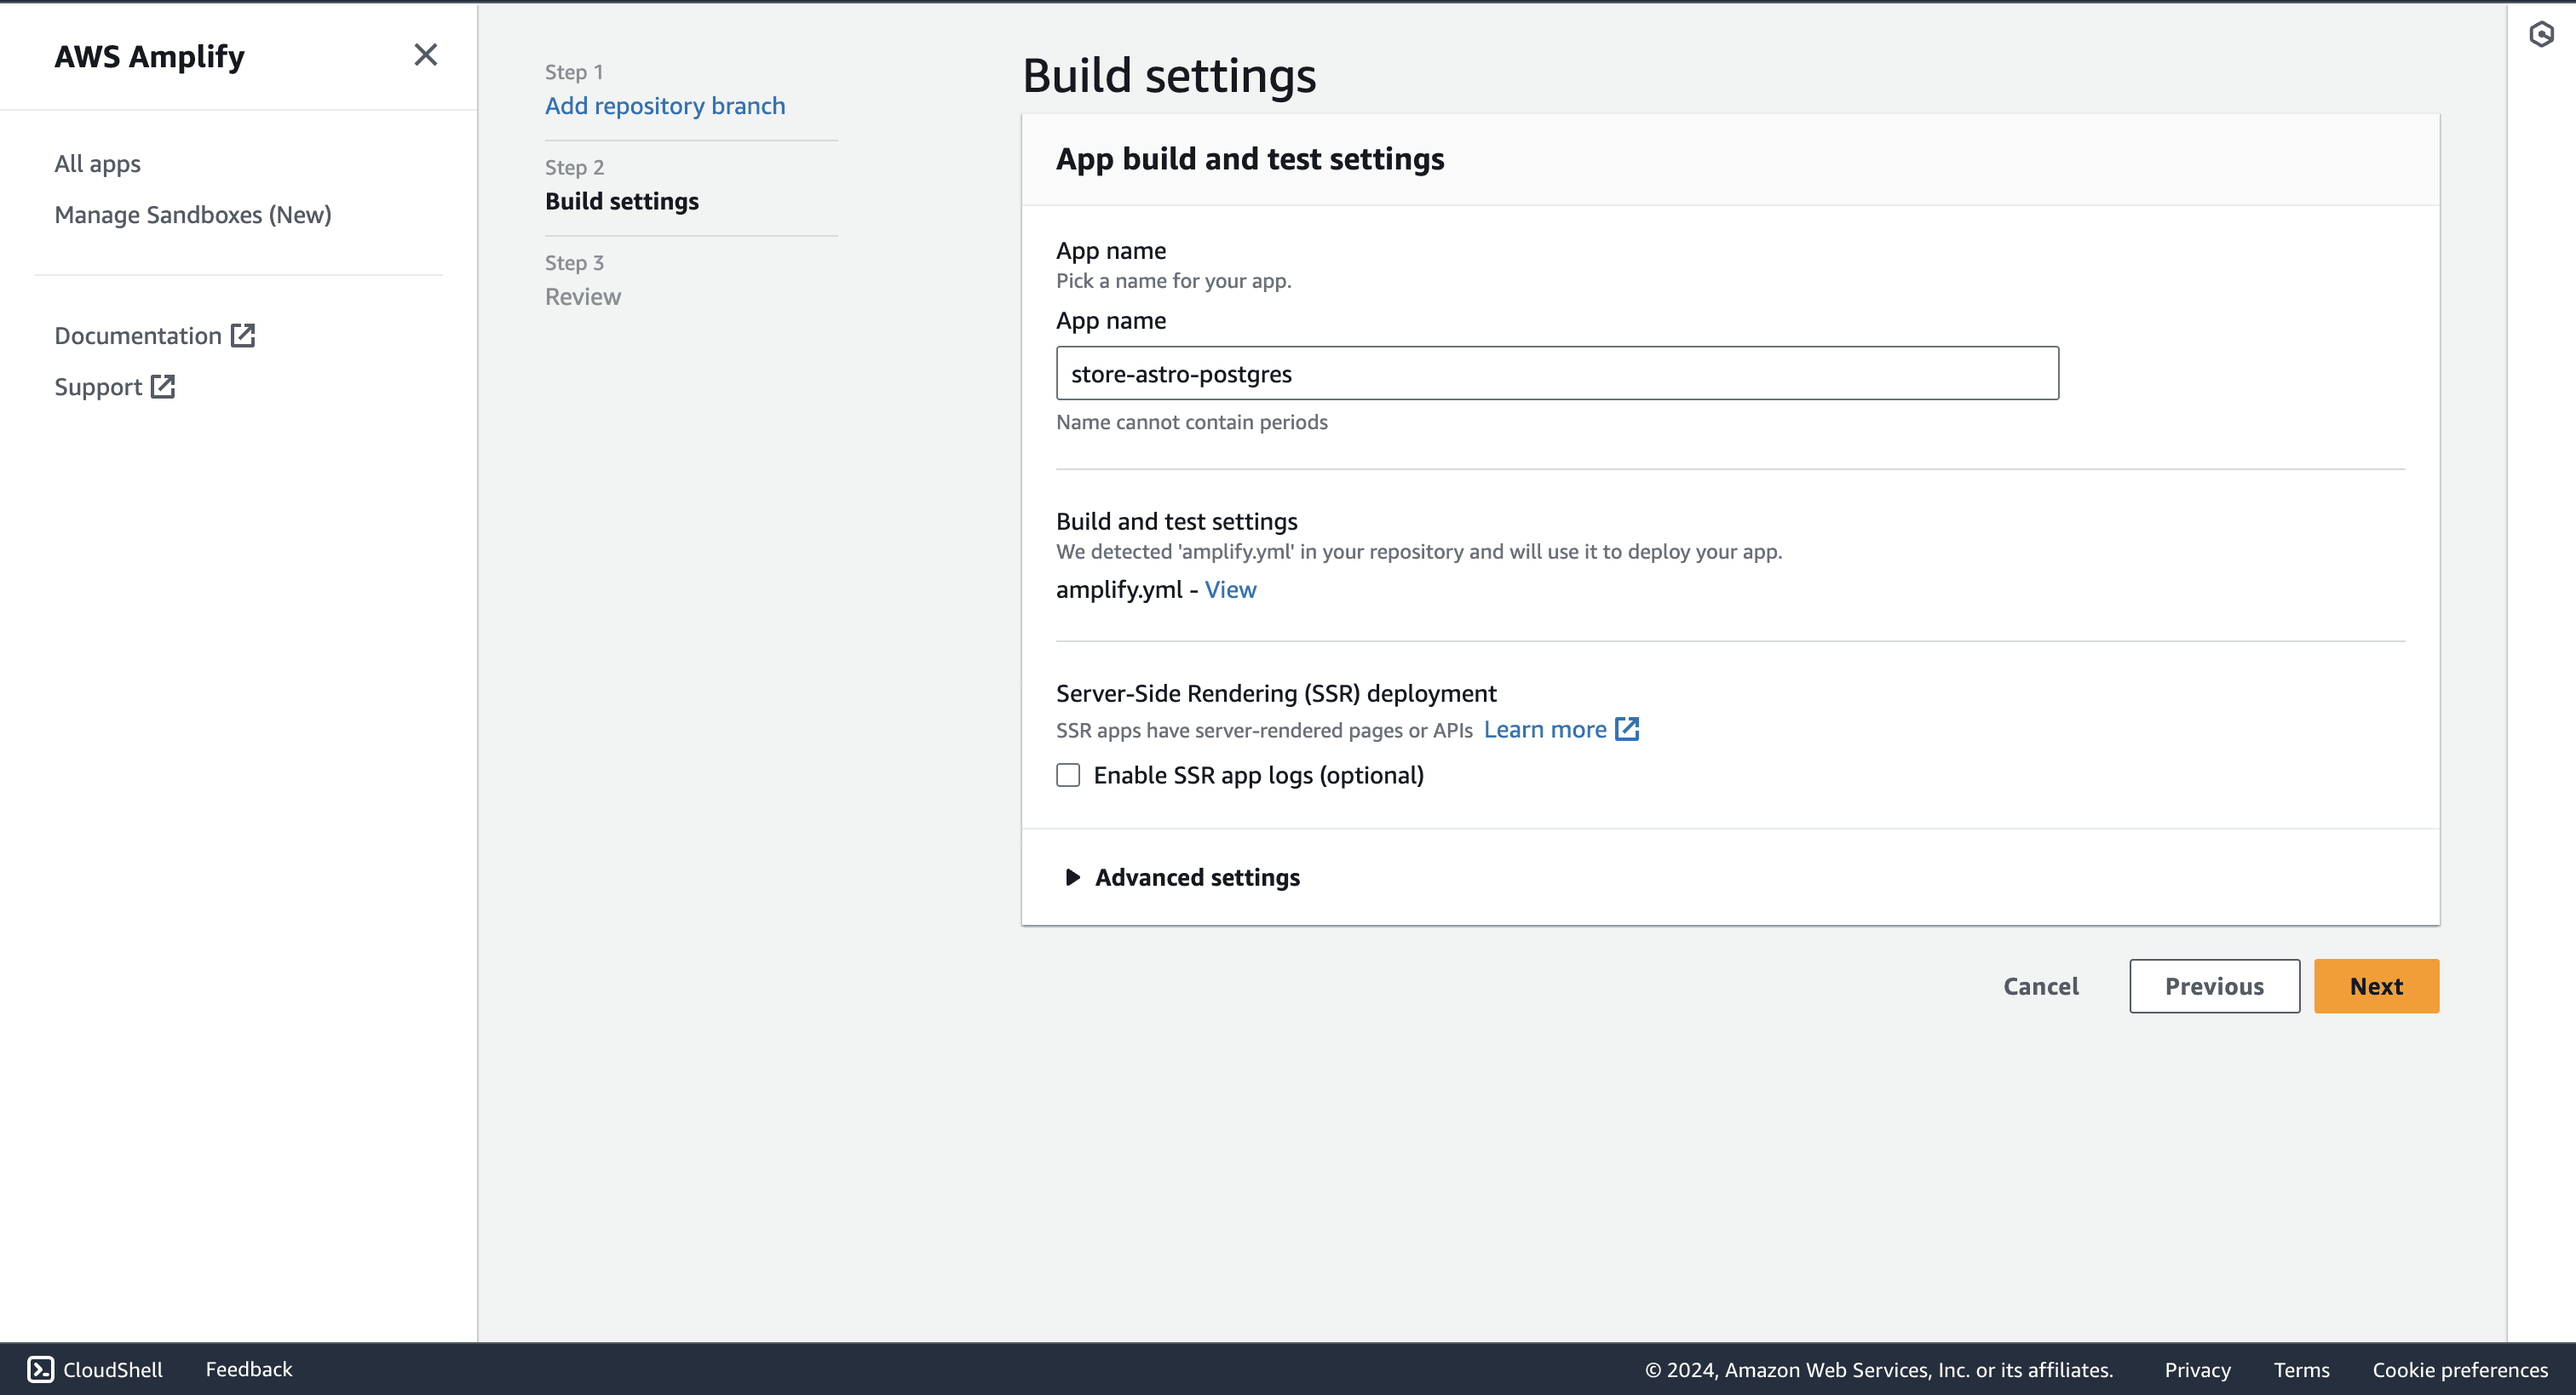
- Give a name to your project, and click on Advanced Settings.
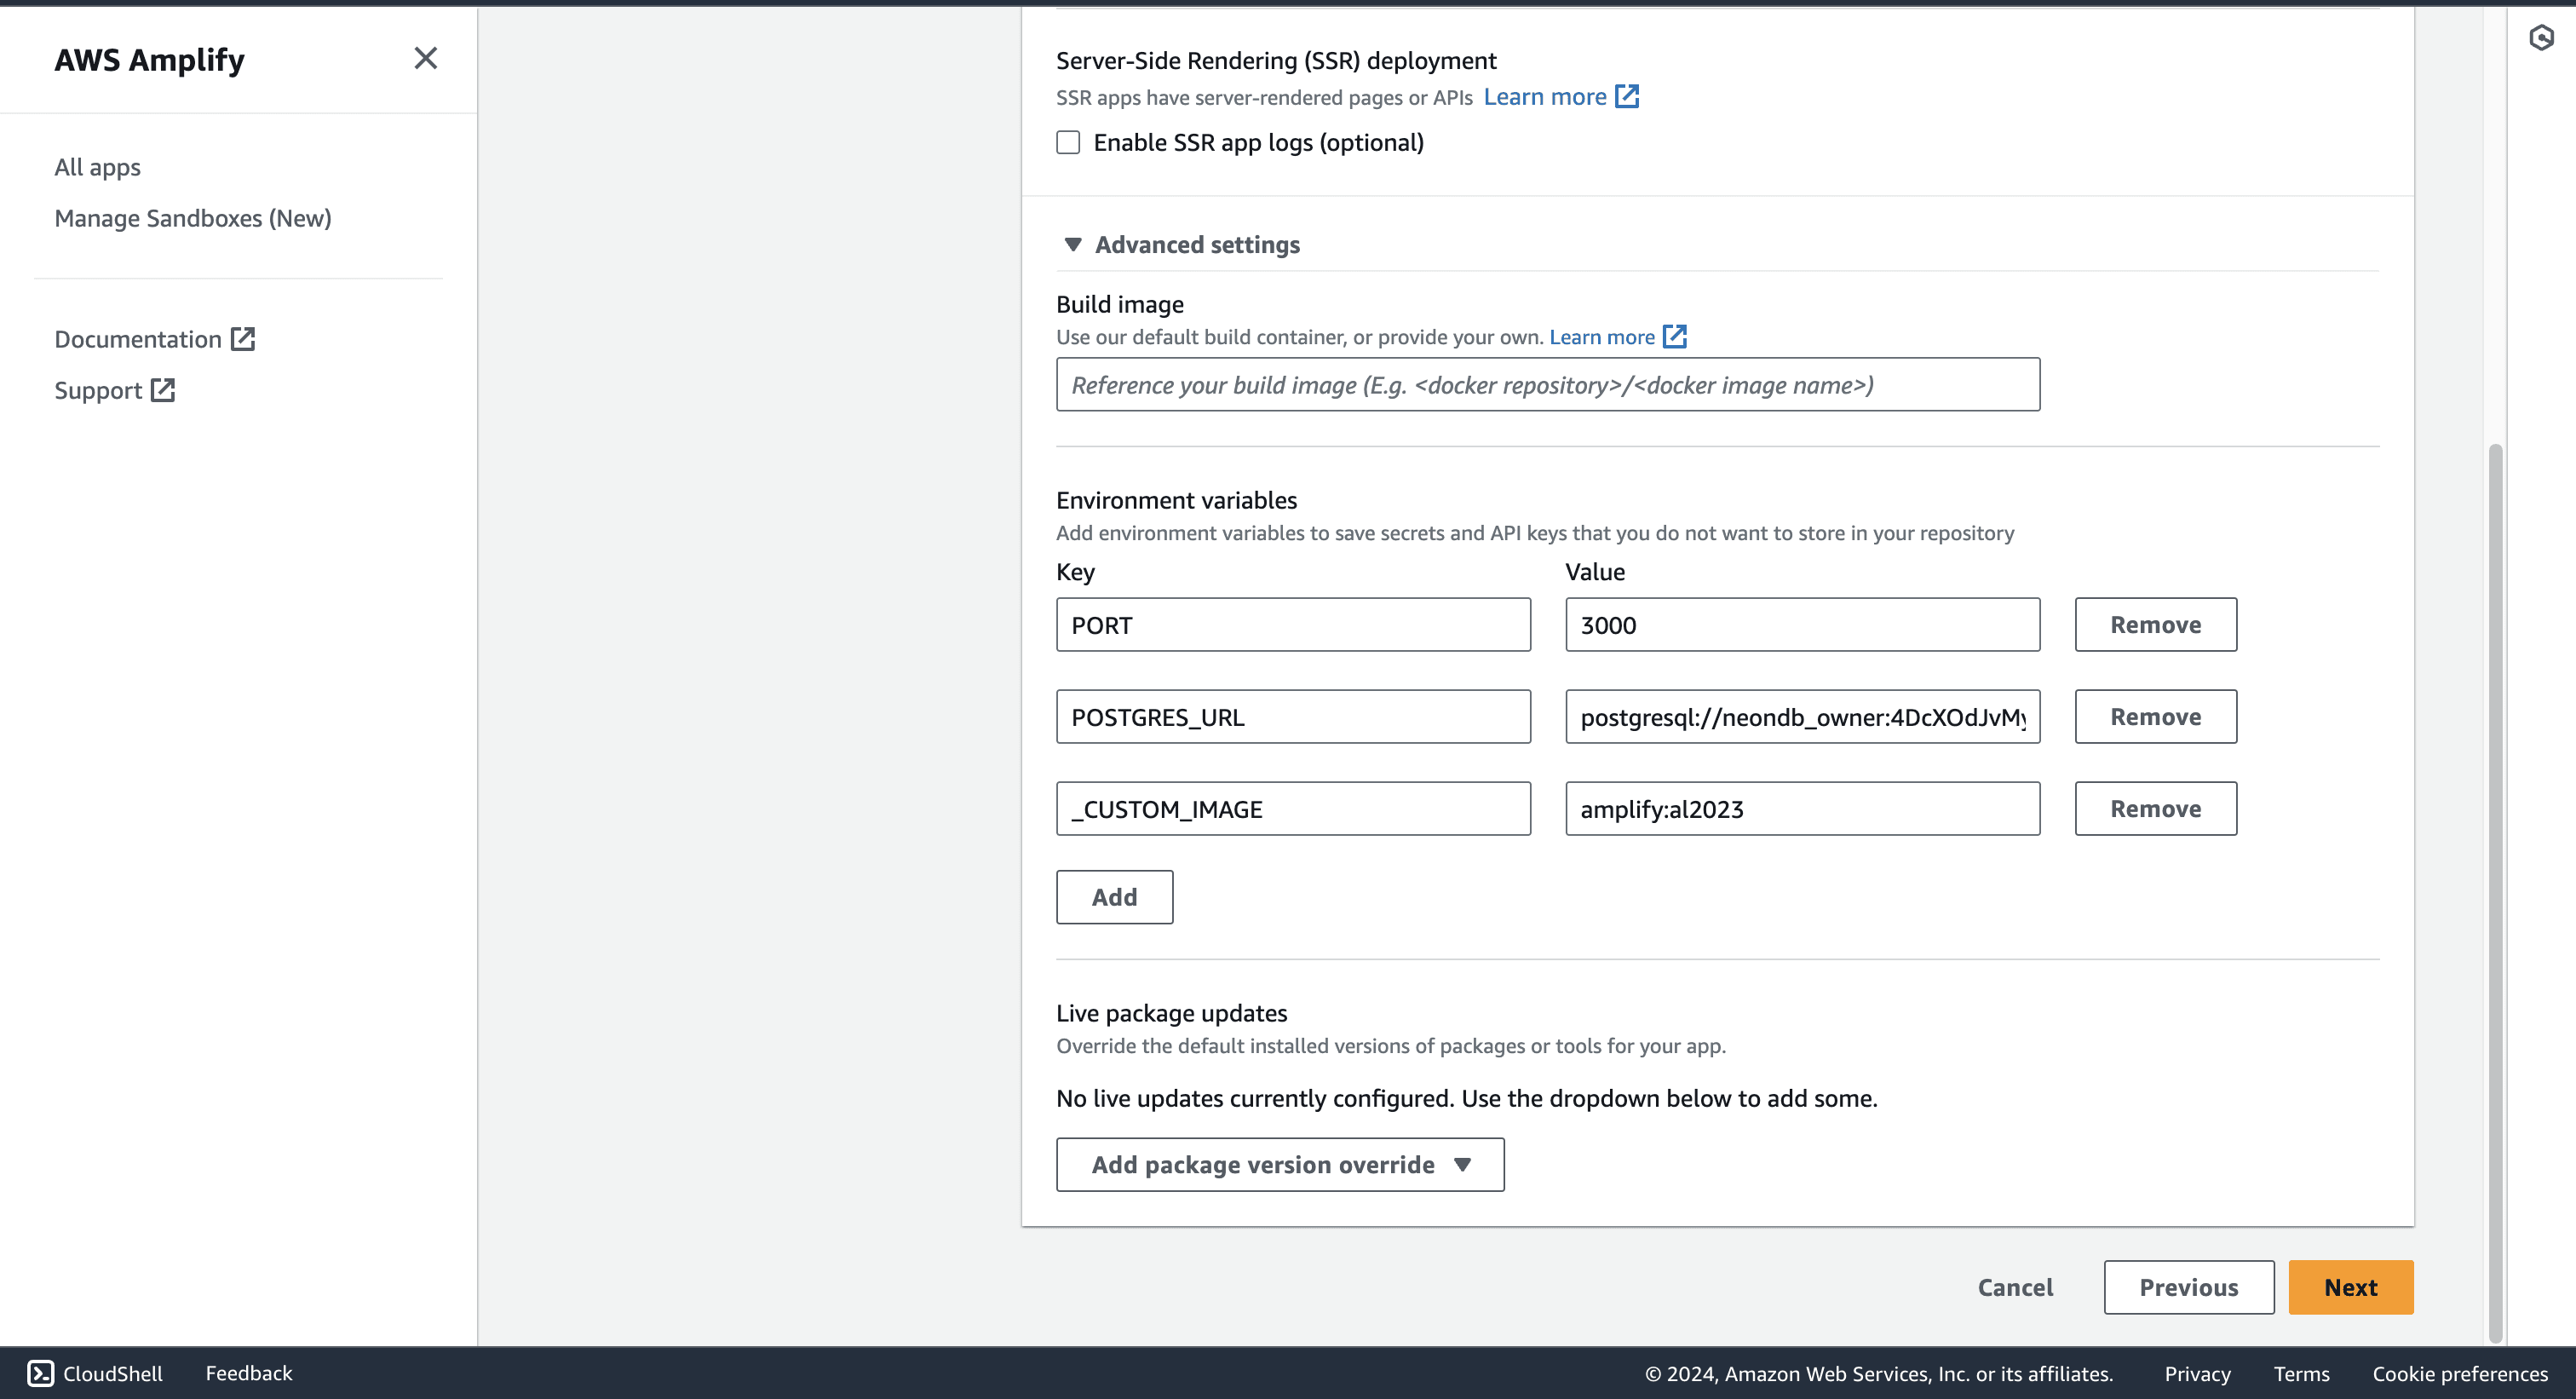
- In Advanced Settings, update the Environment Variables to match those in your local
.envfile, andPORTas 3000. Click Next to proceed.
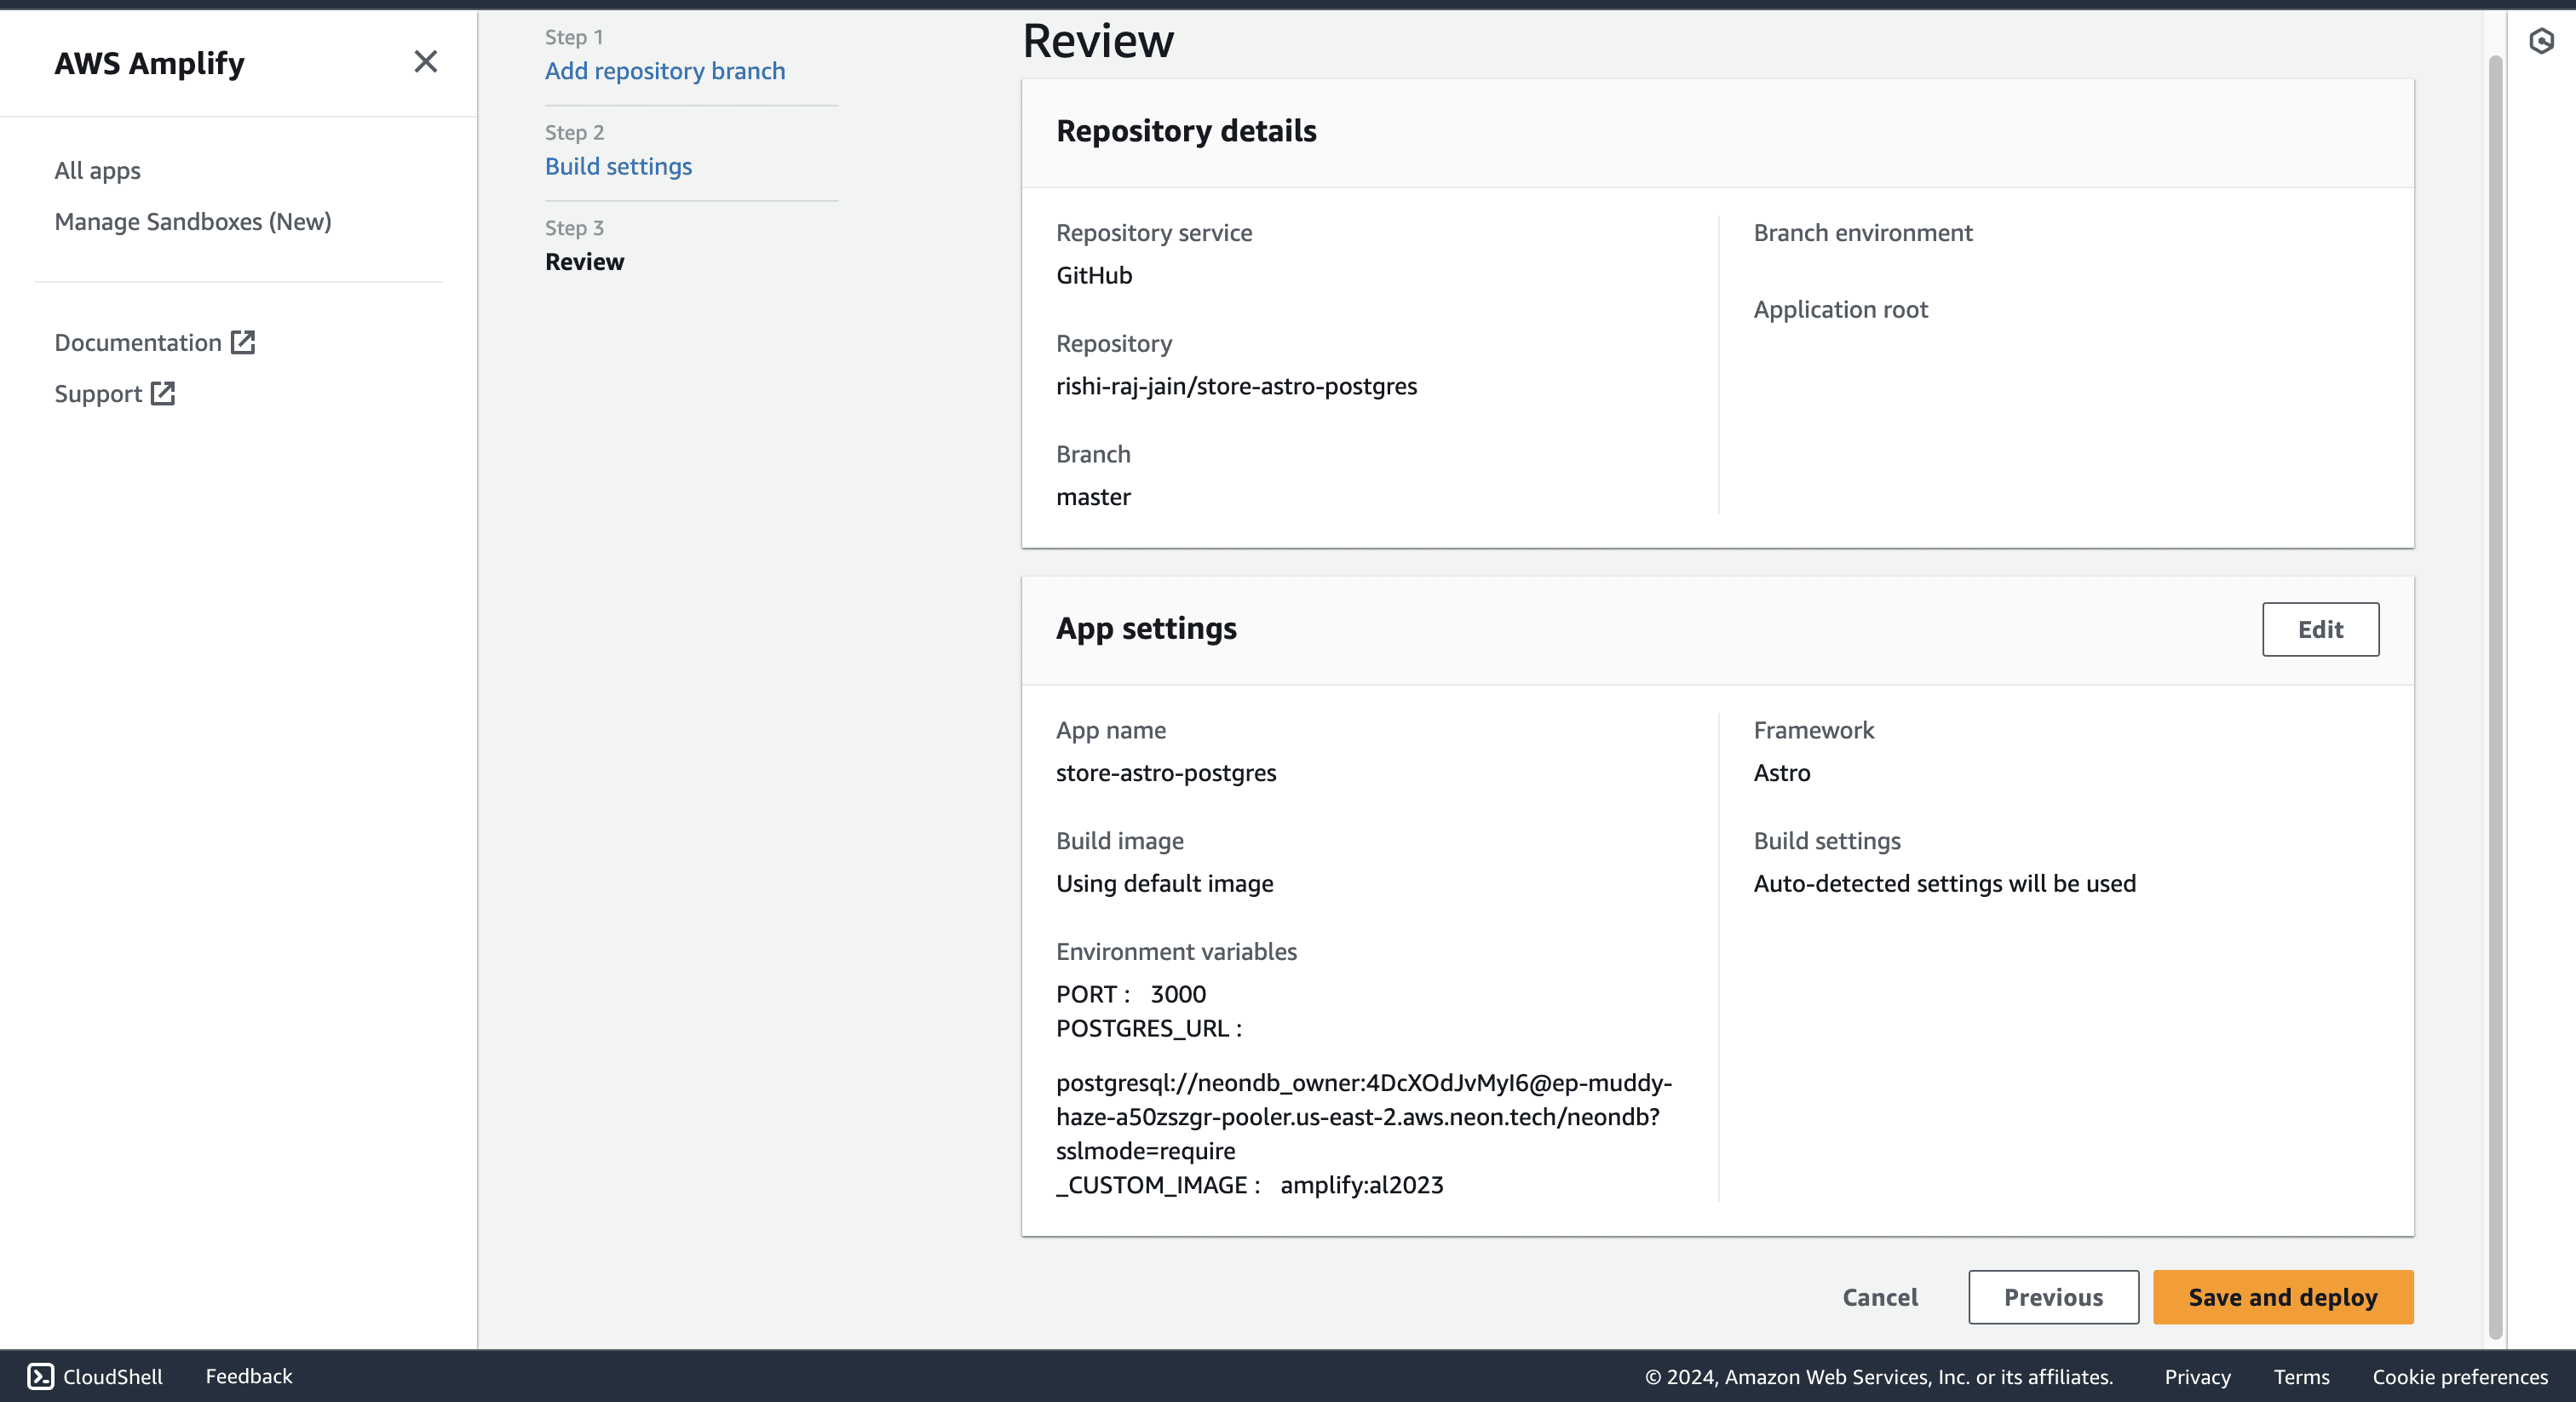
- Click Save and Deploy to deploy your website.
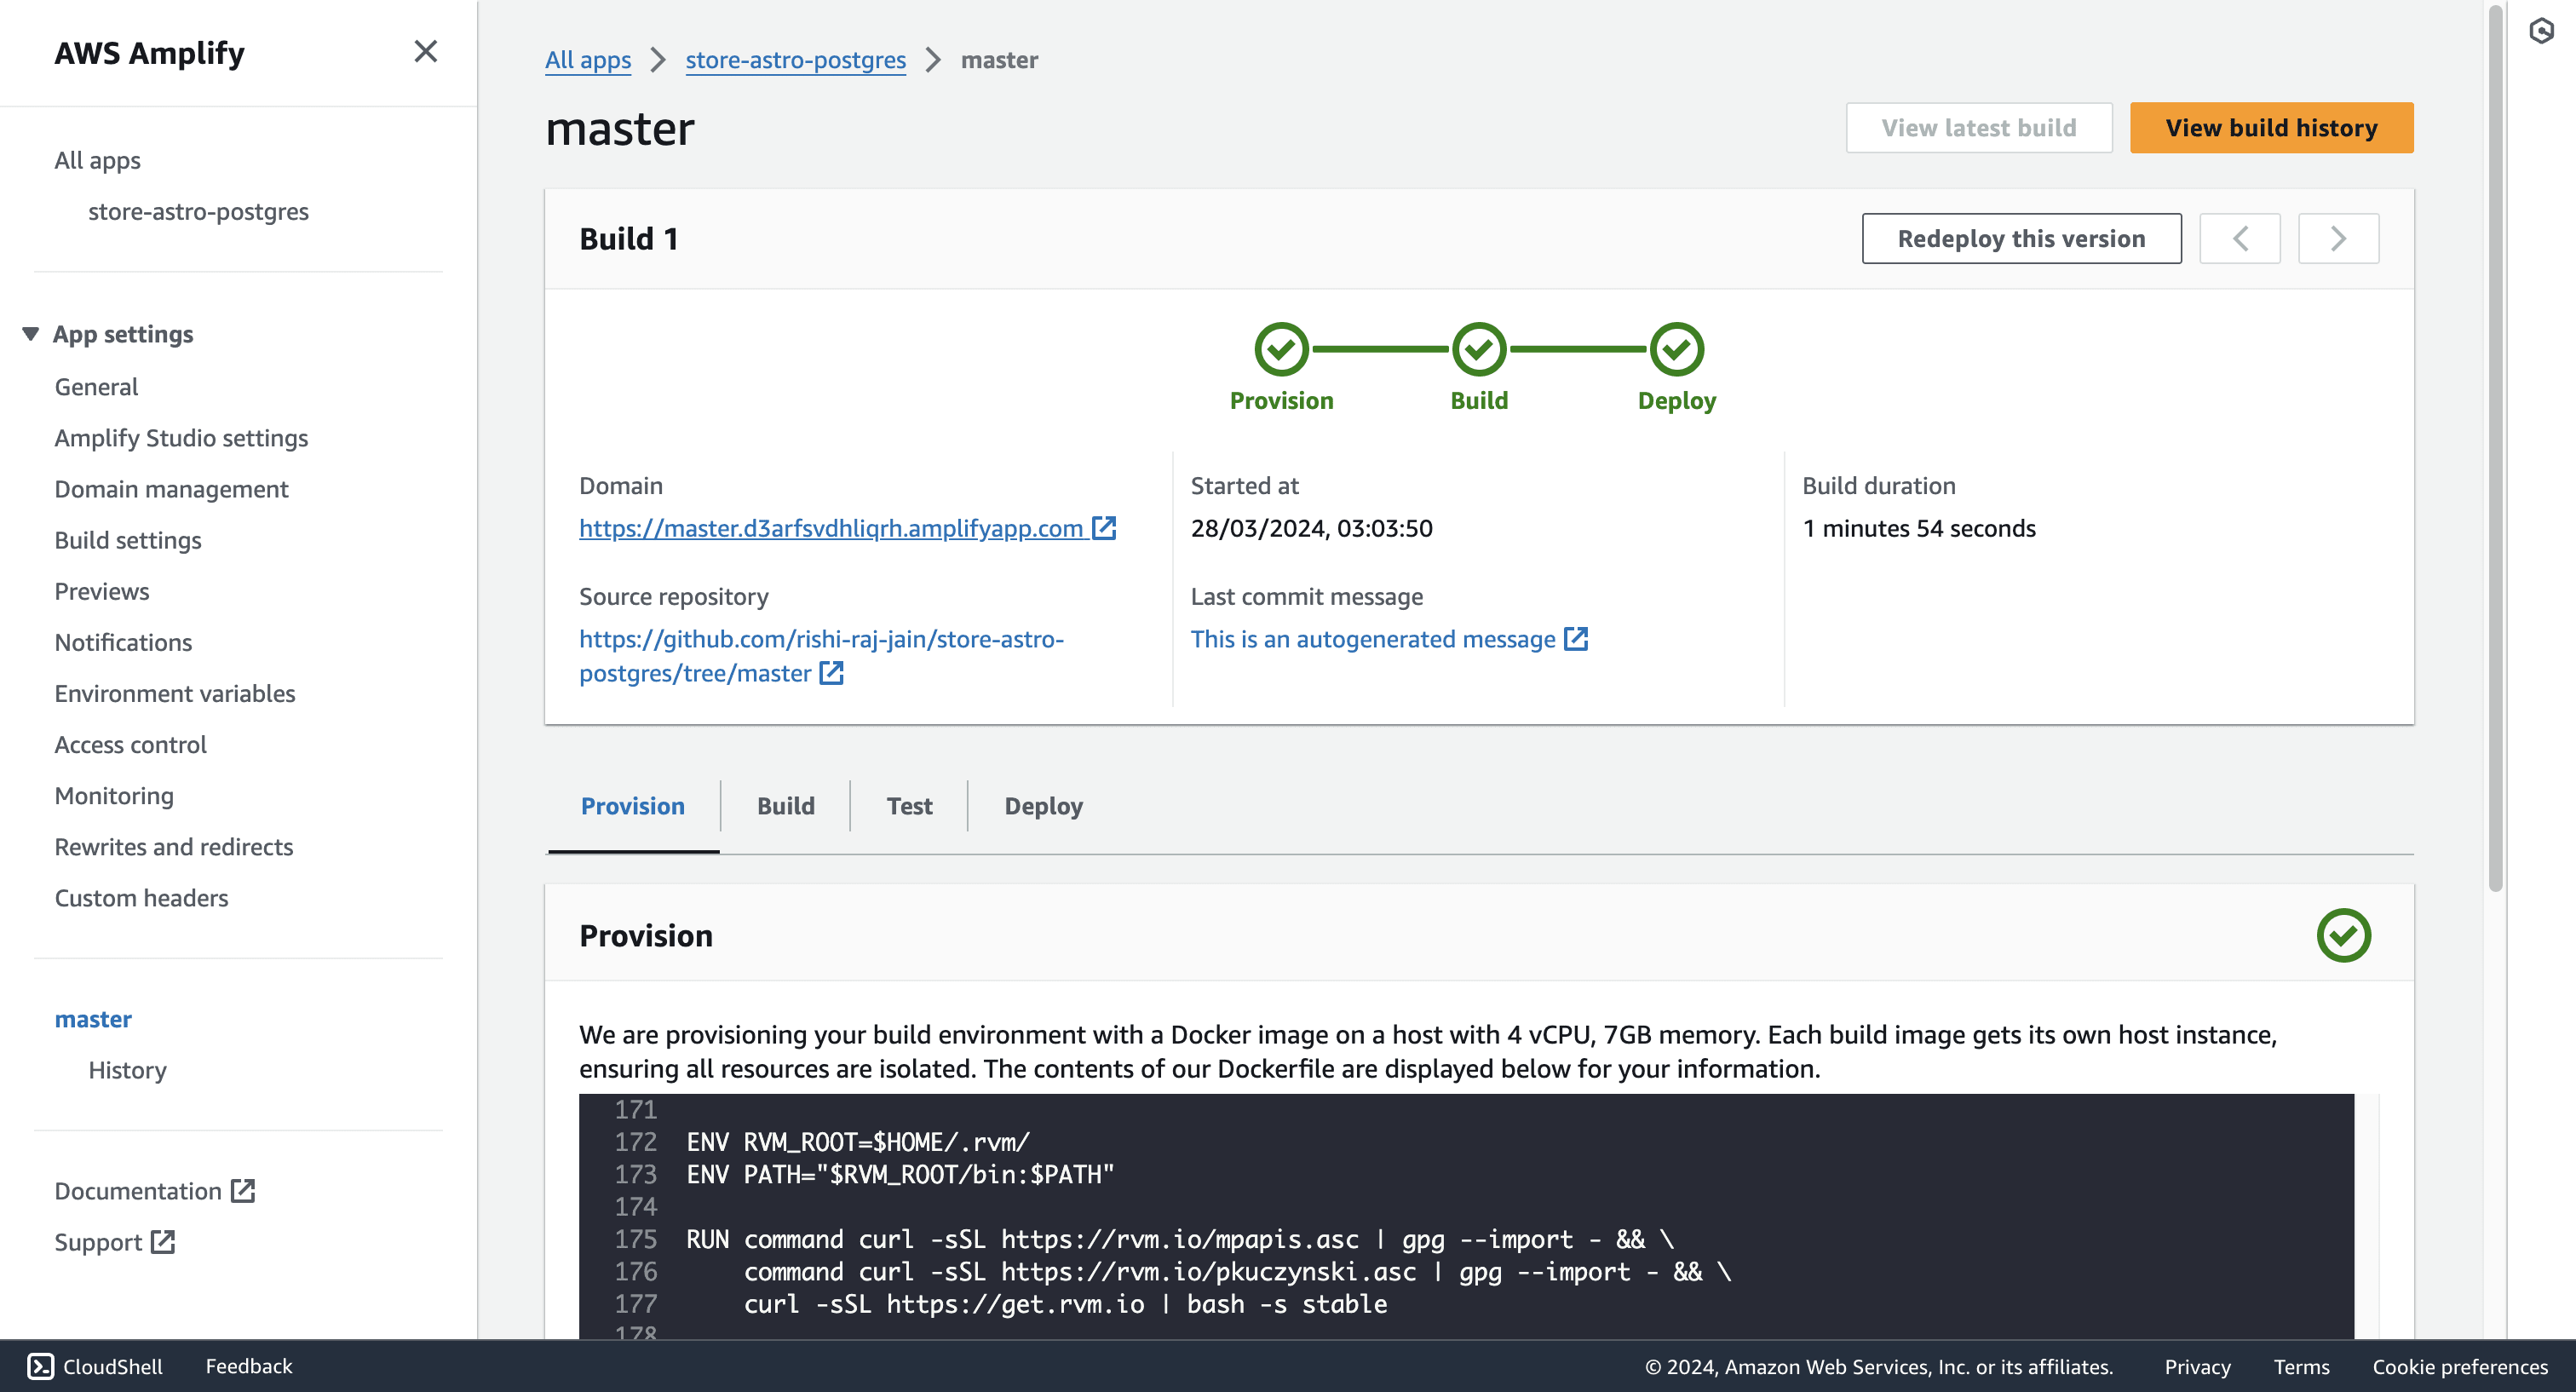
- Grab the deployment URL under the Domain title in the succesful build information.
Summary & Final thoughts
In this guide, you learned how to build a dynamic e-commerce store in Astro by using Serverless Postgres Database (powered by Neon) as the data source. Further, you learned how to prepare an Astro server-side rendered application to be deployed to AWS Amplify.
For more, join us on Discord to share your experiences, suggestions, and challenges.
